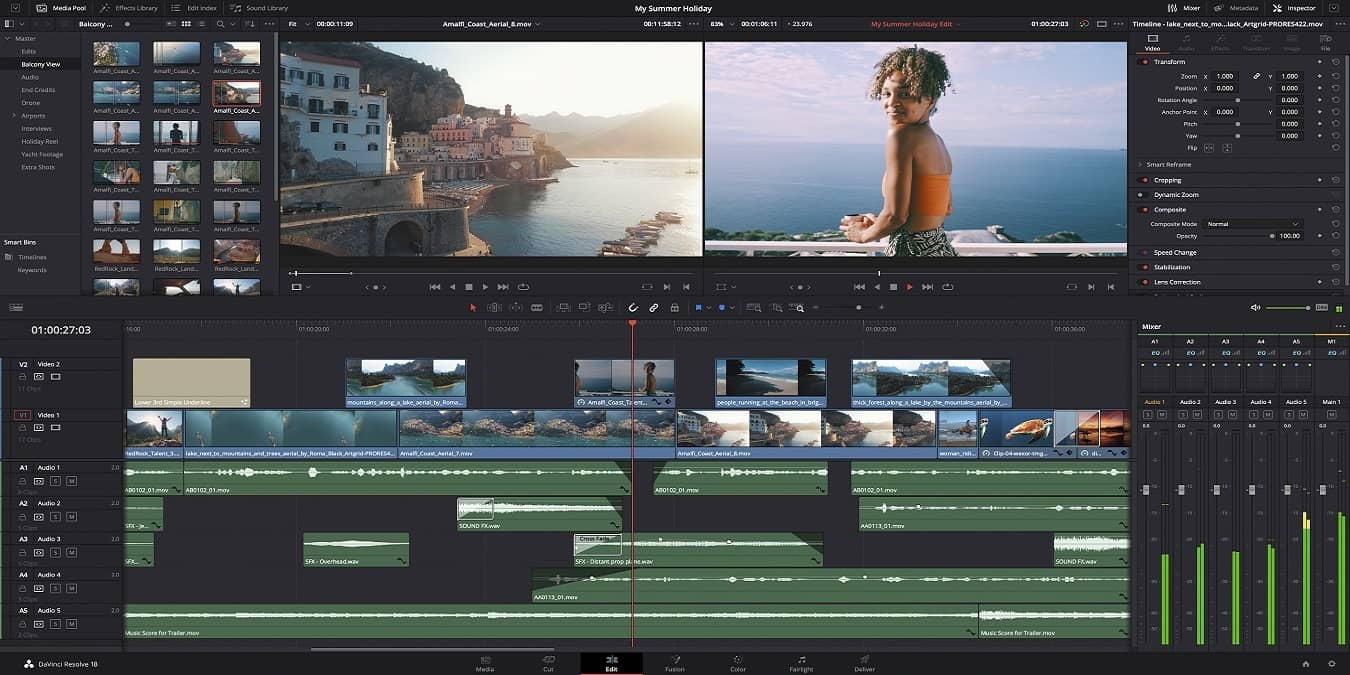
If you are a content creator, especially a video editor, then you have heard about DaVinci Resolve. It’s quickly become a go-to creative software among Linux creators. Since the software supports the Linux platform, you can download DaVinci Resolve in Linux and install it without having to jump through a bunch of hoops.
Tip: if DaVinci Resolve is not your cup of tea, check out other video editors for Linux here.
DaVinci Resolve System Requirements
Before you download anything, make sure your device can support DaVinci Resolve. Since it’s designed for high-end professional video creation and editing, it’s not compatible with your everyday machines. The minimum requirements for Linux are:
- 32 GB RAM
- Discrete GPU that supports OpenCL 1.2 or CUDA 11 and also has a minimum of 2 GB VRAM
- GPU driver that supports NVIDIA or AMD
- Blackmagic Design Desktop Video 10.4.1 or later
- Minimum of CentOS 7.3
- AMD Ryzen 7 or Intel Core i7 CPU
- Fast SSD (solid state drive)
Tip: if you are only doing simple edits to your videos, you can just use YouTube or VLC to get the job done.
Download Linux Binaries
Go to the DaVinci Resolve release page and download the latest version. At the time of writing, the latest version is version 18. However, you can also try out the beta version of 18.5. DaVinci Resolve comes in two versions: free and paid. Select and download the Linux binaries and save them in your download folder.
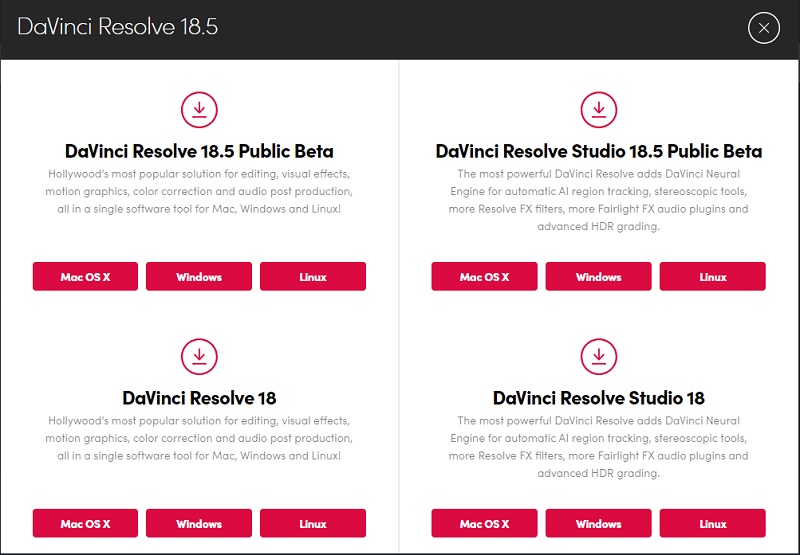
You’ll need to fill out a registration form to download the binaries. This is required for both the free and premium versions.
Install Required Drivers
DaVinci Resolve is heavily dependent on GPU processing. If you have a recent Intel or AMD APU, then your integrated GPU may run DaVinci Resolve on your device. In most cases, you need an Nvidia GPU to run this software. Install the latest Nvidia drivers and CUDA for your Nvidia GPU in your Linux machine.
Install the Latest Nvidia Driver In Ubuntu
For Ubuntu-based distributions, it is very easy to install GPU drivers. Run these commands for rebooting to install the Nvidia GPU for you.
sudo apt search nvidia-driver
sudo apt update && sudo apt upgrade
sudo apt install [driver_name]
Install the Latest Nvidia Driver in Debian
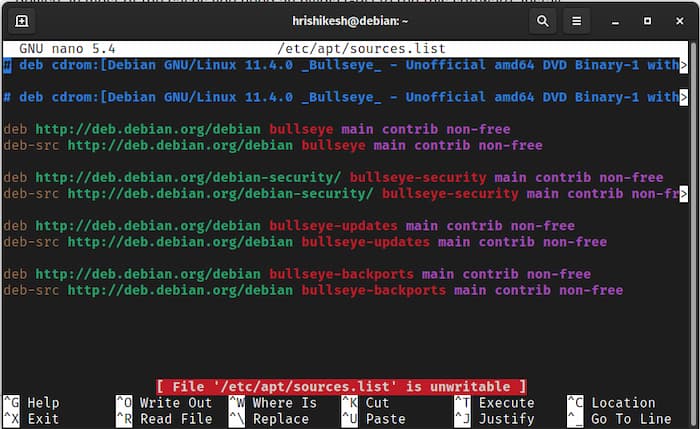
For Debian-based distributions, you have to do something more than run some commands. Open the “/etc/apt/sources.list” file:
sudo nano /etc/apt/sources.list
Add this line to the “sources.list” file. If it’s already present, append the contrib and non-free component.
deb http://deb.debian.org/debian/ bullseye main contrib non-free
Save this file and exit. Run the following command in your terminal to install the Nvidia driver.
sudo apt update
sudo apt install nvidia-driver firmware-misc-nonfree
To install Cuda, you only need to run one command:
sudo apt install nvidia-cuda-dev nvidia-cuda-toolkit
After installation, reboot your device so that the changes can take effect.
sudo systemctl reboot
Install the Latest Nvidia Driver in Fedora
To install the Nvidia driver in Fedora Linux, you first need to enable the RPM fusion repository.
sudo dnf update
sudo dnf install https://download1.rpmfusion.org/free/fedora/rpmfusion-free-release-$(rpm -E %fedora).noarch.rpm
https://download1.rpmfusion.org/nonfree/fedora/rpmfusion-nonfree-release-$(rpm -E %fedora).noarch.rpm
Detect the Nvidia GPU and install the required drivers.
lspci | grep VGA
sudo dnf install akmod-nvidia
After installation, reboot your machine and you are good to go.
sudo reboot
Good to know: you can stress test your graphic card in Linux to see if it is good enough to use DaVinci Resolve.
Build a Deb Package
The DaVinci Resolve Linux build was released to run on CentOS, a RedHat-owned distribution. Therefore, If you are using Fedora or another RedHat distribution, you don’t need to follow the build step.
For Fedora users, you have to unzip the downloaded file and double-click on the installer. It automatically installs and sets up all the files for you.
For Debian and Ubuntu-based distributions, you have to convert the DaVinci Resolve .run file into a .deb file.
- To make this conversion possible, download and extract the MakeResolveDeb script.
- Create a folder and copy the DaVinci Resolve Installer and MakeResolveDeb script into the folder.
- Before the conversion, install some required dependencies to build and run DaVinci Resolve flawlessly.
sudo apt install libssl1.1 ocl-icd-opencl-dev fakeroot xorriso
- Run the following command to convert your .run file to a .deb file, assuming that you put both the script and .run installer into the same folder.
./makeresolvedeb*.sh DaVinci_Resolve_*_Linux.run
It is quite an intensive process, so give your machine some time to extract and build the .deb package for you. When completed, you will be greeted with a .deb file ready to be installed.
Installing Deb Package
Installing a .deb file is really easy in Debian and Ubuntu derivatives. Run this command to install the package:
sudo dpkg -i <.deb file name>
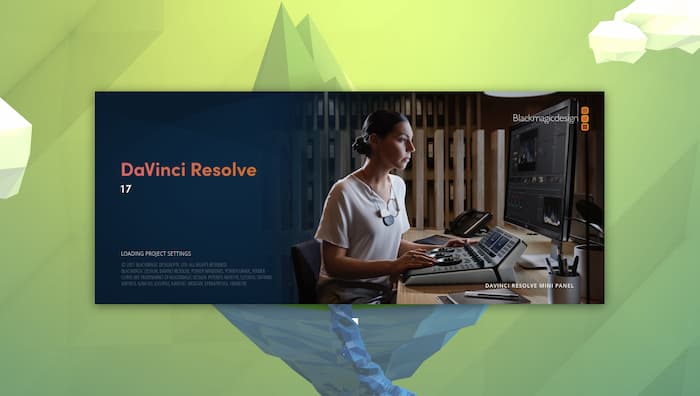
If this command runs without any errors, you can see the DaVinci Resolve icon in your app grid. Open the app and you will see a splash screen like the below image.
Note: for those using Arch Linux, you can install deb packages in Arch Linux too.
DaVinci Resolve Free vs. Paid
The DaVinci Resolve free version comes with all the basic features you need to edit your video, make motion graphics, color correct and edit your sounds.
Along with the free version, DaVinci Resolve studio version (paid) adds features such as a neural engine, stereoscopic 3D tools, dozens of extra Resolve FX filters, and Fairlight FX audio plugins, plus advanced HDR grading and HDR scopes.
All the studio features are required if you are working on a huge project, like filmmaking and documentaries. To make simple YouTube videos, the free version is enough for most users.
If you buy any Blackmagic gadgets, you get the studio version free of cost. If you are a professional video editor, consider buying the gadgets you may need.
Video Transcode to Use in Davinci Resolve
In the free version of DaVinci Resolve, the H264 codec is not supported. If you record a video using this codec, you have to transcode the video to another format that DaVinci Resolve supports. To transcode our video, we are using FFmpeg.
FFmpeg is a very powerful video transcoding and processing library and has many customization options. You can read the documentation to customize FFmpeg. To install it on your device, run the following command:
sudo apt update
sudo apt install ffmpeg
To edit your video inside DaVinci Resolve, you have to convert it to .mov format.
ffmpeg -i input.mp4 -vcodec dnxhd -acodec pcm_s16le -s 1920x1080 -r 30000/1001 -b:v 36M -pix_fmt yuv422p -f mov output.mov
In the above command, it’s assumed your input file is “input.mp4” and the output file name is “output.mov.” You can change the names according to your preference.
To convert .mkv to .mp4, run the following command.
ffmpeg -i input.mkv -map 0:0 -map 0:1 -map 0:2 -vcodec dnxhd -acodec:0 pcm_s16le -acodec:1 pcm_s16le -s 1920x1080 -r 30000/1001 -b:v 36M -pix_fmt yuv422p -f mov output.mov
Set Up OBS Studio for Davinci Resolve
If you want to edit your screen recordings using DaVinci Resolve and don’t want to transcode your recorded file every time you want to edit, then you have to change some settings in your OBS application.
Inside your OBS settings, navigate to the “output” option and change the output mode to advanced.
Switch to the recording tab and change the output type to the custom output option (FFmpeg). Select “MOV” as the container format and “mpeg4” as a video encoder. In the audio encoder option, select the “pcm_s16le” option. You can refer to the settings below and make changes in your OBS software accordingly.

Save the settings and restart the OBS software. You can test if the settings are working or not by recording a little clip and importing it into your DaVinci Resolve software.
Transcode for Online Upload and Save Space
You can see that when we transcode the files to edit in DaVinci Resolve, the sizes are very big – sometimes hundreds of gigabytes. Therefore, editing and uploading the rendered file of a few hundred gigabytes takes a very long time. Even if you want to store the files on your hard disk, those sizes are very huge compared to their length.
To fix this issue, we are using FFmpeg to transcode and compress our file. Run the following command in your terminal:
ffmpeg -i input.mov -vf yadif -codec:v libx264 -crf 1 -bf 2 -flags +cgop -pix_fmt yuv420p -codec:a aac -strict -2 -b:a 384k -r:a 48000 -movflags faststart output.mp4
“input.mov” is your .mov file from DaVinci Resolve, and “output.mp4” is your output .mp4 file. You can change these names to your preference.
You can change the compression and output quality by adjusting the -crf flag. By default, I set it to 1, the highest quality. You can set this flag up to 25 for maximum compression. It also reduces video quality when -crf is a very high number.
Frequently Asked Questions
Is DaVinci better than Premier?
It is about personal choice. If you are familiar with Premier, and your editing workflow revolves around Adobe software, then it is better to use Premier than Resolve. If you are a newbie and want to learn DaVinci Resolve, then you are good to go. If you are an M1 Mac owner, then DaVinci Resolve runs better in Apple M1 Macs.
Is 8GB RAM enough for DaVinci Resolve?
You need at least 32 GB of RAM to run DaVinci Resolve smoothly on your device. In addition to RAM, you need a powerful graphic card with 2 GB or more VRAM to make your workflow smooth. I recommend that you invest in a desktop rather than a laptop.
Why is DaVinci Resolve not opening?
This could be due to several reasons, such as:
- Using an older version of CentOS or another distro – DaVinci Resolve isn’t guaranteed to work on other distros
- Graphics card driver isn’t compatible
- Device doesn’t meet the minimum requirements
- Using plugins that aren’t compatible with Linux – If using Windows-only plugins, you’ll need to use DaVinci Resolve via wine
- Issues with connected USB peripherals
- Improper installation – Reinstall to see if this helps
- Using an integrated GPU versus a dedicated GPU
Try opening DaVinci Resolve in Terminal to see if you get any missing library errors. If so, you’ll need to install anything that’s missing for the software to open.
Why is DaVinci Resolve crashing?
If DaVinci Resolve is crashing while in use or upon starting, it could be some of the same reasons as to why the software might not open at all. In most cases, it’s a slight configuration issue. For instance, if you update your drivers, DaVinci Resolve may not be compatible with the newer versions yet.
Also, if you’re using DaVinci Resolve on another distro, you may need to upgrade or even downgrade certain packages. For example, some Arch Linux users had to downgrade the curl package and block future updates to get the software to work properly. To help you get the right configuration for your distro, try the Blackmagic Forum Linux Issues thread, which includes setup guides for Debian, Linux Mint, Ubuntu, Arch Linux, and even dual boot systems.
Also, update DaVinci Resolve, if an update is available. Known issues are resolved regularly with updates.
How do I update DaVinci Resolve?
Updates are released to address issues and add features. Check for updates by clicking the “DaVinci Resolve” menu at the top left corner. Select “Check for Updates.”
If you’re updating to an entirely new version versus just an update within the same version, ensure the system requirements haven’t changed or you may run into issues.
Image credit: Blackmagic Design Media


