When you want to structure data or details in a clean and clear way in a Word document, tables are ideal. You can insert a table with the number of columns and rows you want, add borders, shading, and banded rows, and even apply an attractive style. If you’re new to using tables in Microsoft Word, this tutorial shows you how to create and customize tables in your documents.
How to Insert a Table in Word
Microsoft makes it super easy to insert a table to your Word document. The two ways to do add one are described below.
Insert a Table With the Grid
For the simplest way to insert a table, select the number of columns and rows.
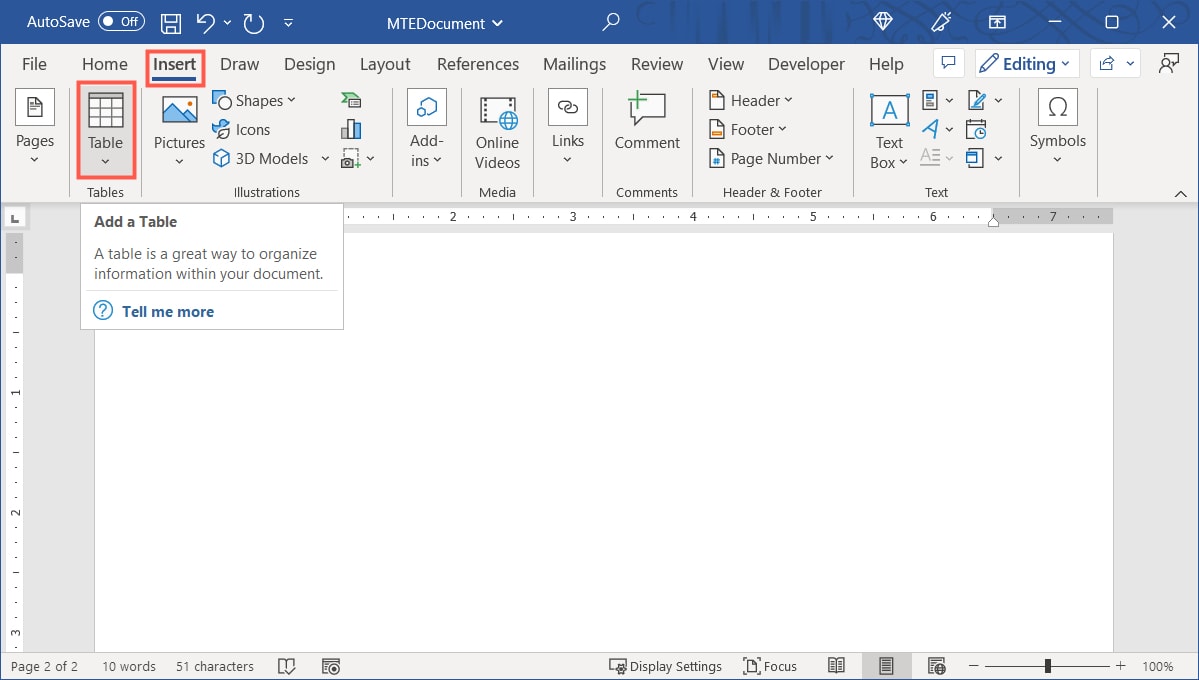
- Place your cursor where you want the table and navigate to the “Insert” tab. Select the “Table” drop-down arrow in the Tables section of the ribbon.
- Drag your cursor across and down the grid at the top of the drop-down menu. As you drag, you’ll see the number of columns and rows for your table as well as a preview of the table.
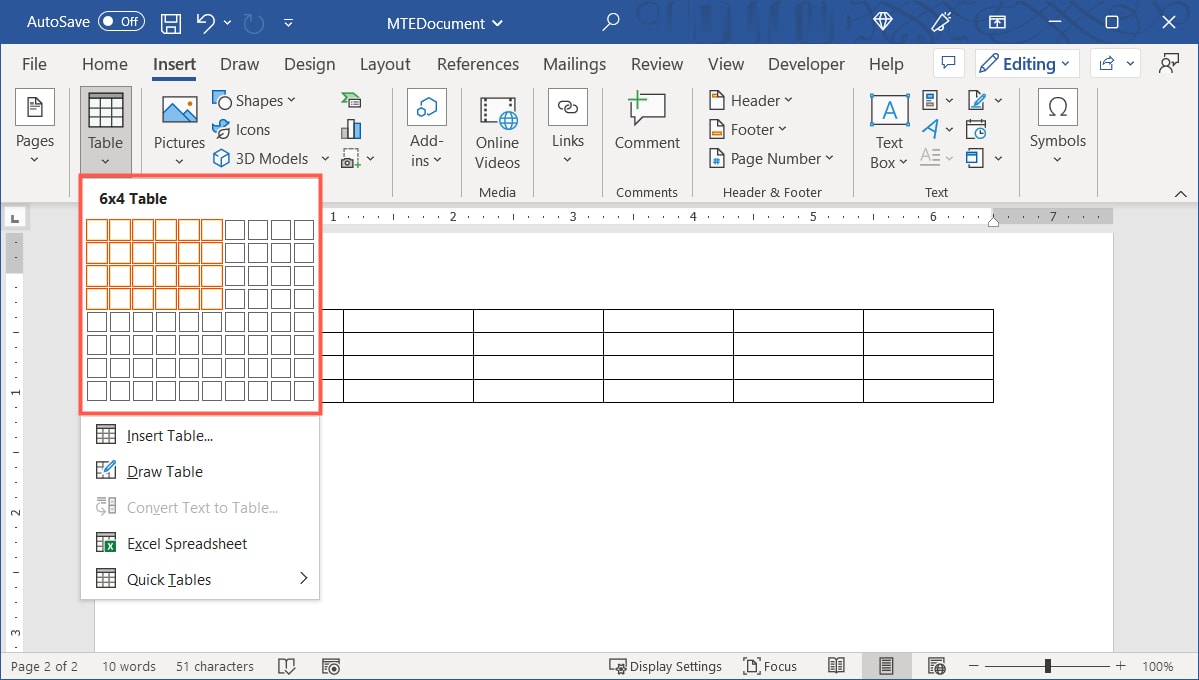
- When you see the dimensions you want, click. Your table will pop into your document.
Insert a Table and Adjust the Settings
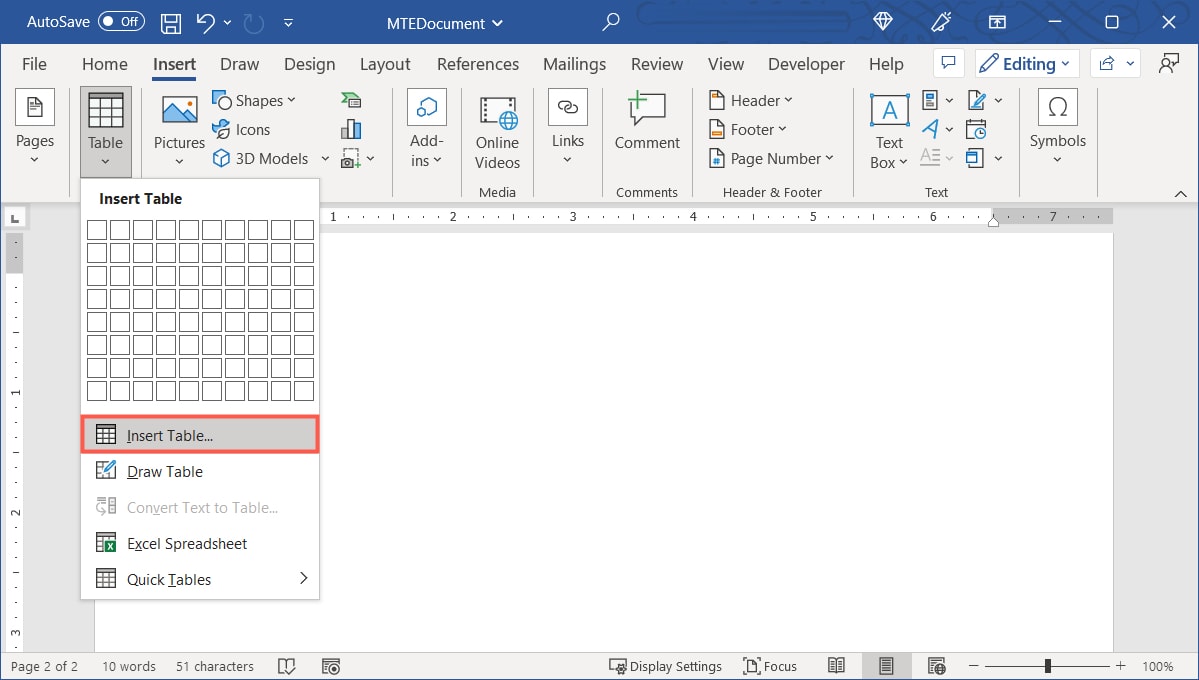
If you’d like to take care of a few table settings upfront, use the “Insert Table” option.
- Place your cursor where you would like the table, navigate to the “Insert” tab, and select the “Table” drop-down arrow.
- Select “Insert Table” in the drop-down menu.
- At the top of the pop-up box, enter the number of columns and rows you’d like.
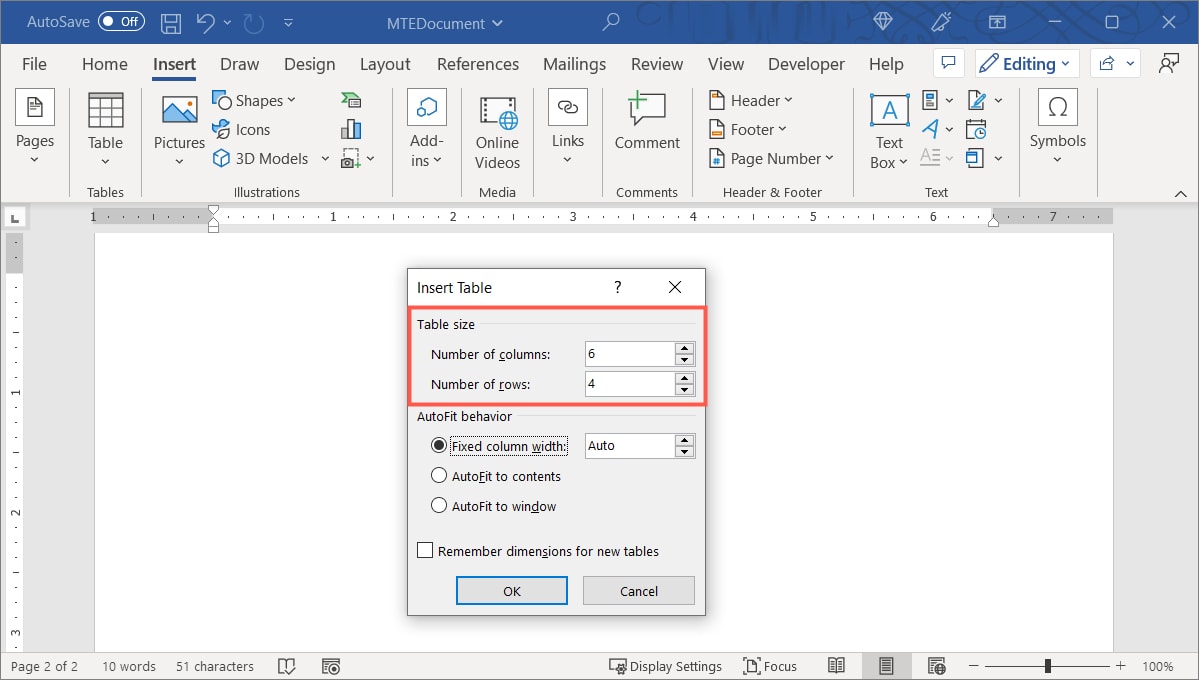
- Choose an auto-fit setting for the table.
- Fixed column width: choose “Auto” for automatic sizes or enter a particular measurement for the columns.
- AutoFit to contents: size your table width according to the data within it.
- AutoFit to window: size your table according to the Word window size.

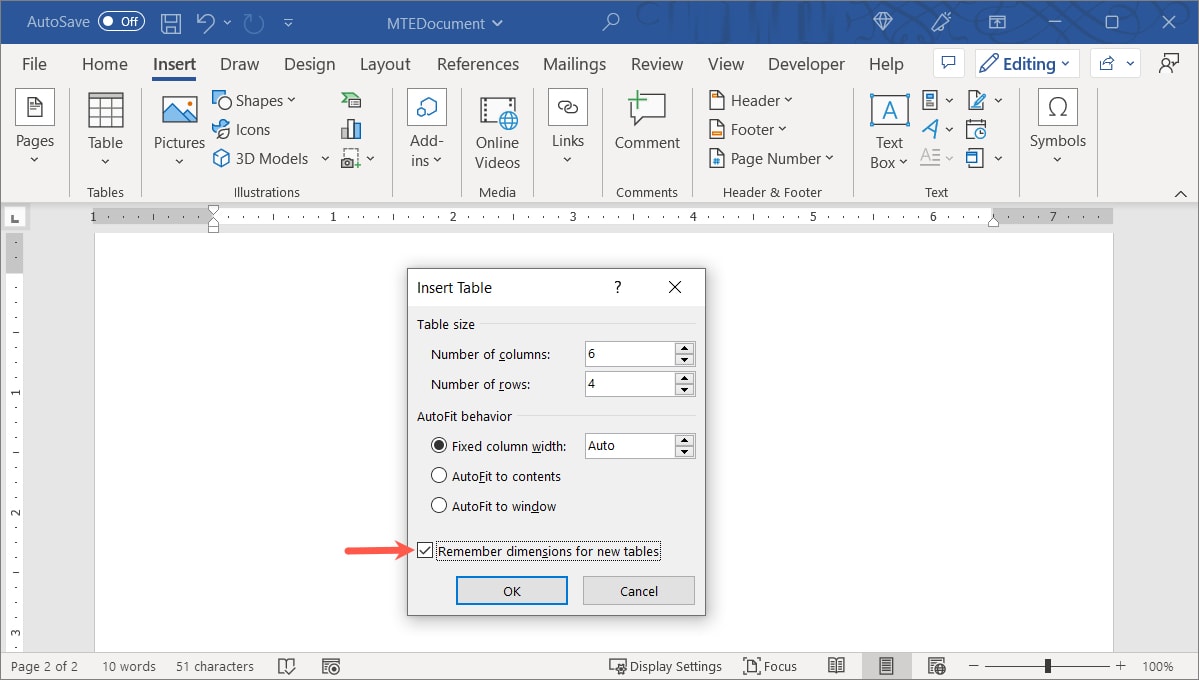
- If you’d like new tables you create to adhere to these same settings, check the box at the bottom to “Remember dimensions for new tables.”
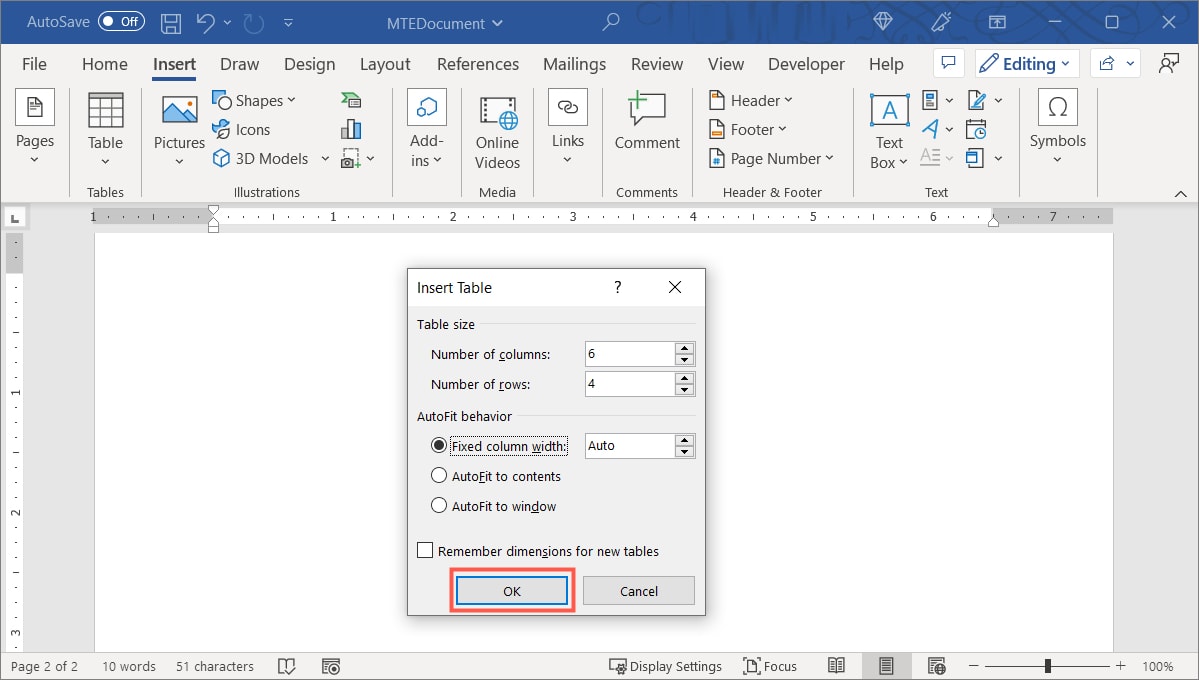
- When you finish, click “OK” to create your table in Word.
Note: read this tutorial to learn how to create a macro to create tables in Word.
How to Resize a Table in Word
Once you insert the table in Word, you may want to resize it manually. Either adjust the size of the entire table or just the columns and rows.
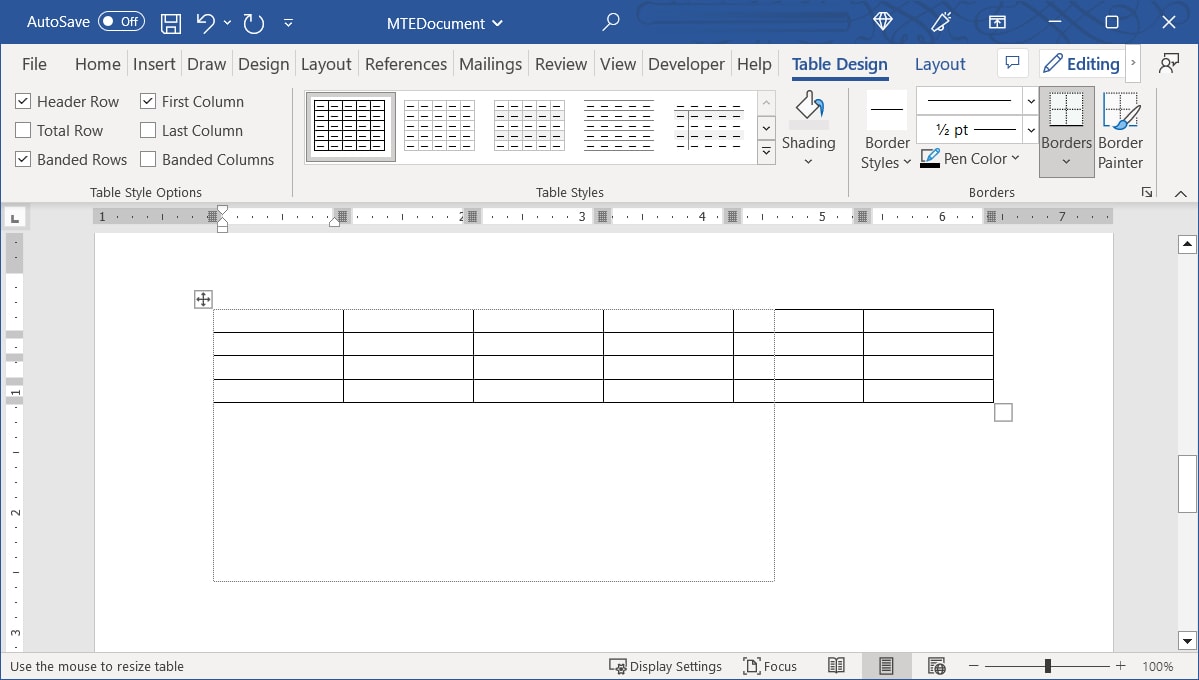
Resize the Table
To make the entire table larger or smaller, just drag.
- Select the table and grab the square that appears in the bottom-right corner.
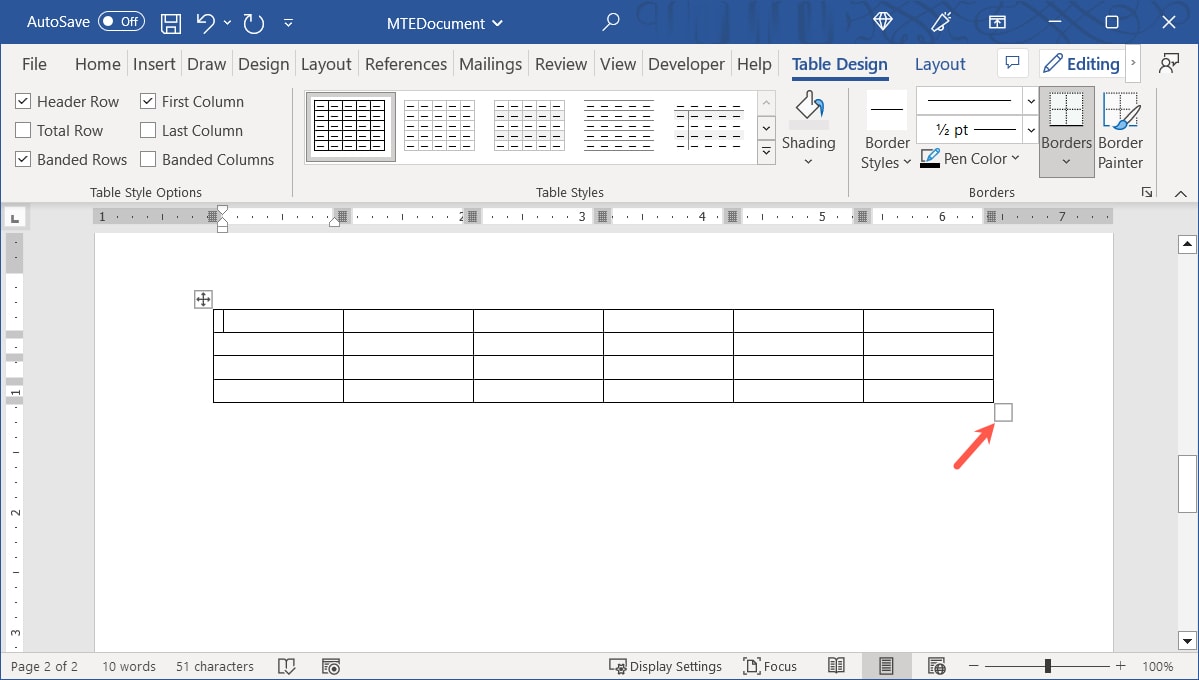
- Drag the square in, out, up, or down to adjust the size of the table.
Resize a Column or Row
If you only want to adjust the size of a column or row, this is just as easy.
- Hover your cursor over a column or row border and a double-sided arrow will appear. The arrows face left and right for columns and up and down for rows.
- When you see the arrow, click and drag. Drag left or right to resize a column or up or down to resize a row.
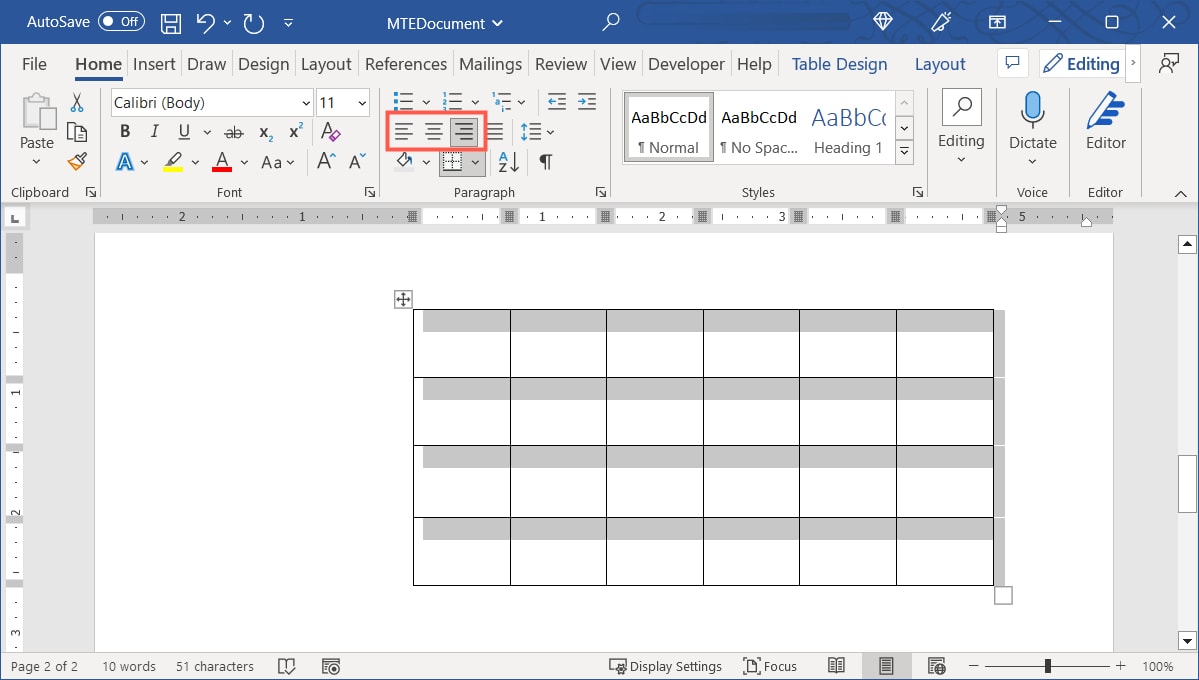
How to Align a Table in Word
If you resize your table so that it doesn’t stretch the width of the page, you may want to align it on the left, center, or right in your document.
- Select the table and head to the “Home” tab.
- Use the Align Left, Center, or Align Right button in the paragraph section of the ribbon to position your table on the page.
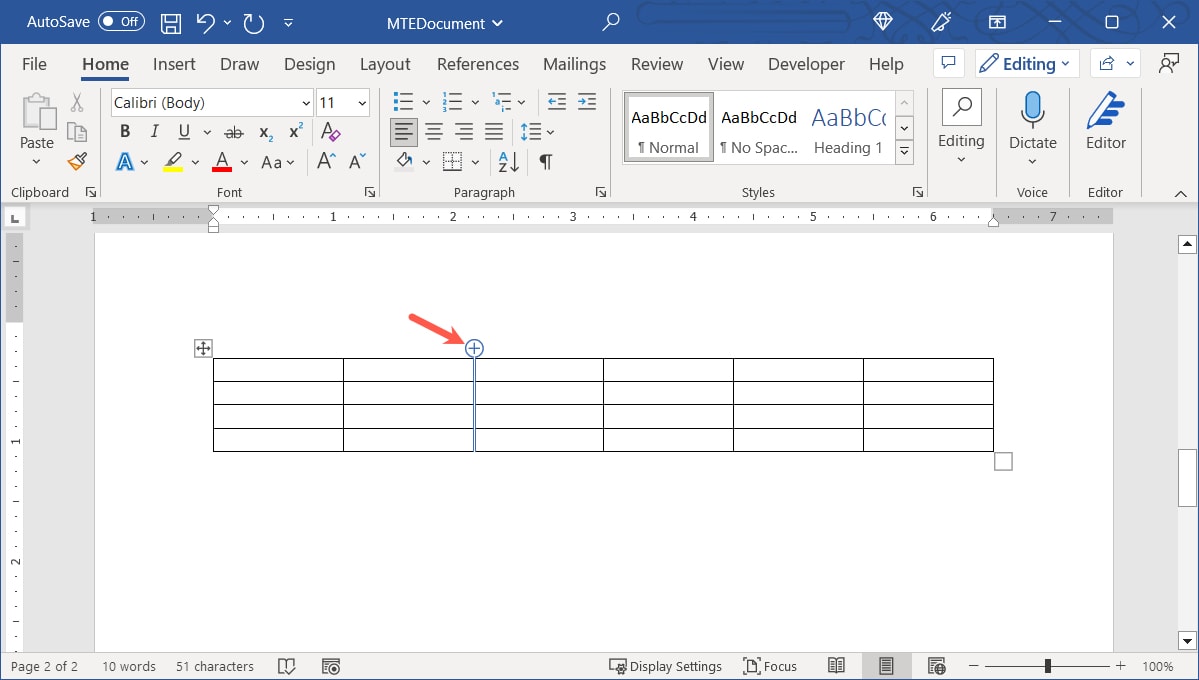
How to Insert or Remove Columns or Rows
You might insert a table with a plan for its dimensions, then realize you have too many or too few columns or rows. Columns and rows can be added in a snap.
Add Columns or Rows
- To insert a single column or row, place your cursor at the top (column) or left (row) of the table. When the plus sign appears, click it.
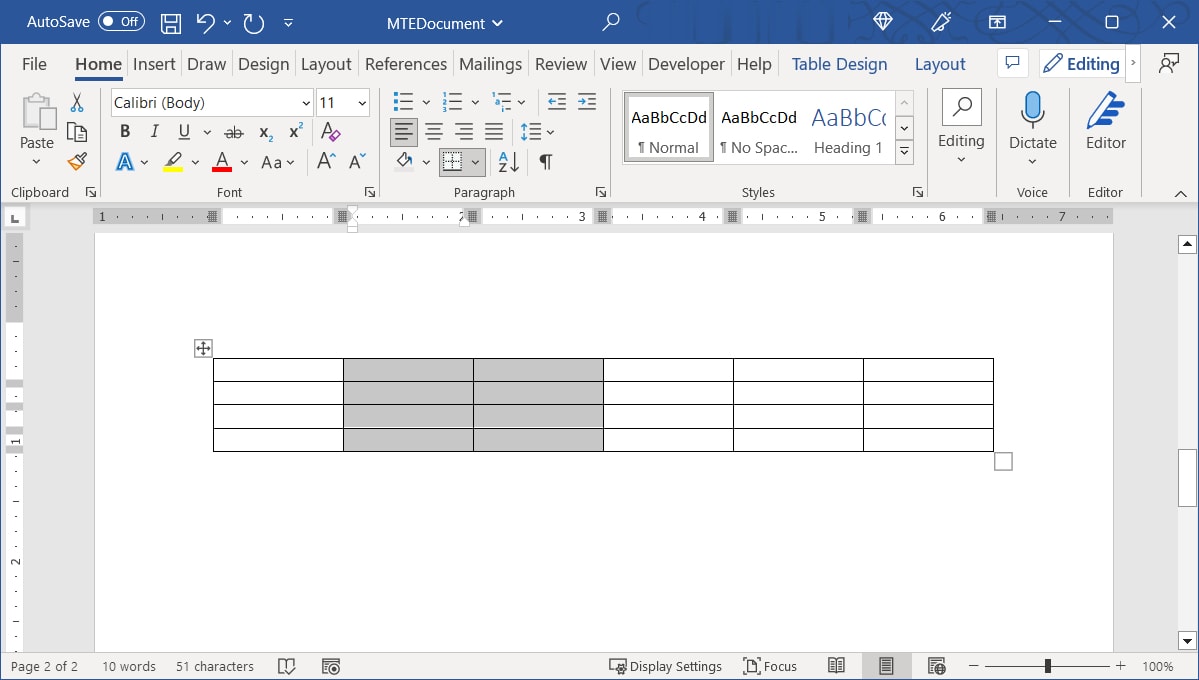
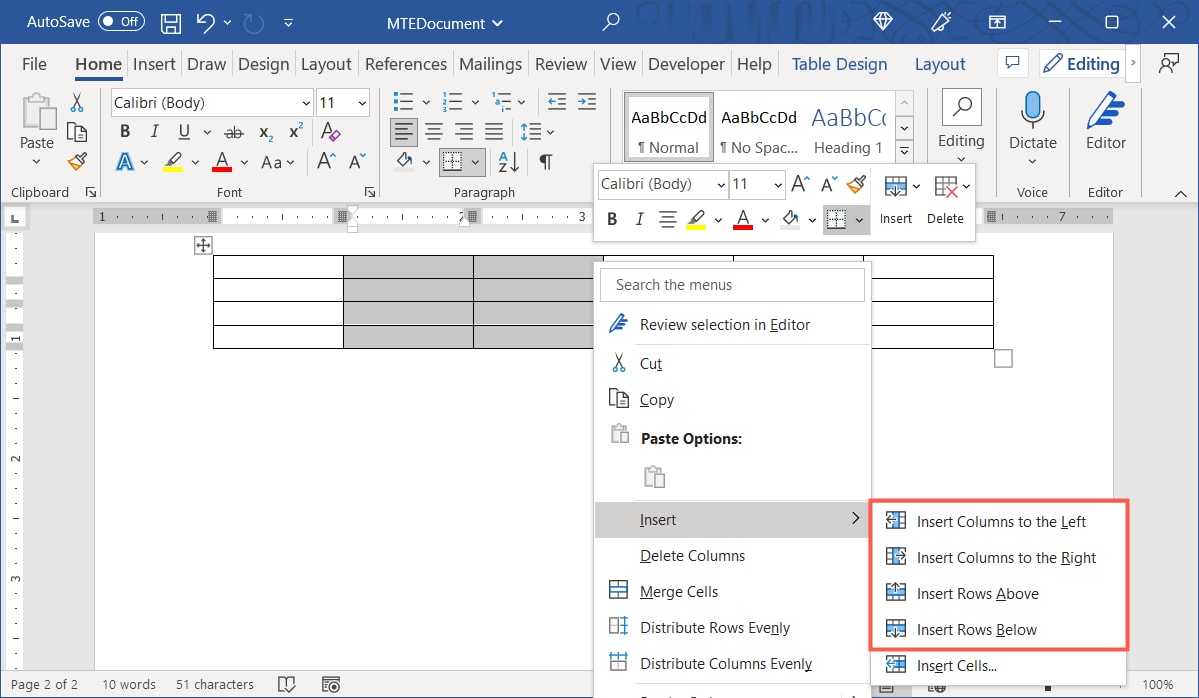
- To insert multiple columns or rows, select the same number of existing columns or rows. For example, if you want to add two columns, select two existing columns by dragging your cursor through or above them.
- Right-click, move to “Insert” in the menu and select to inserting to the left or right for columns or above or below for rows.
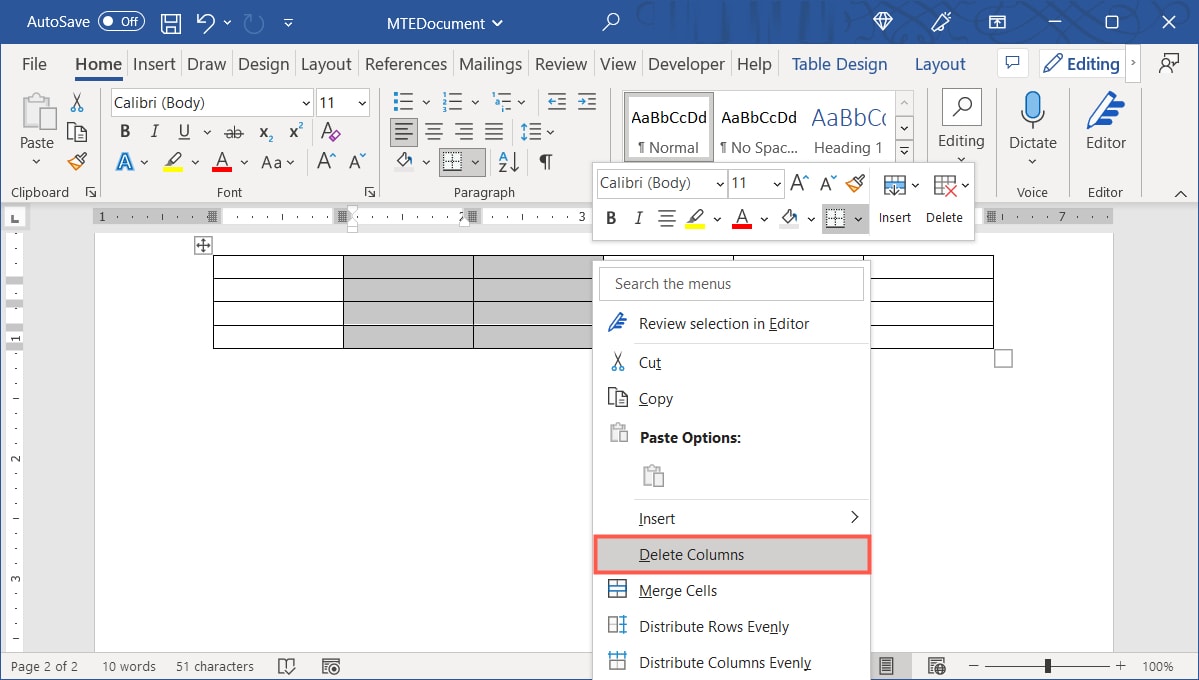
Remove Columns or Rows
To remove a column or row, select it. For more than one, select multiple columns or rows by dragging through them. Right-click and choose “Delete Columns” or “Delete Rows.”
How to Add a Border or Shading to a Table
Once table has been inserted, aligned, and sized as you would like, you may want to spruce it up a bit by adding a border or shading to the table.
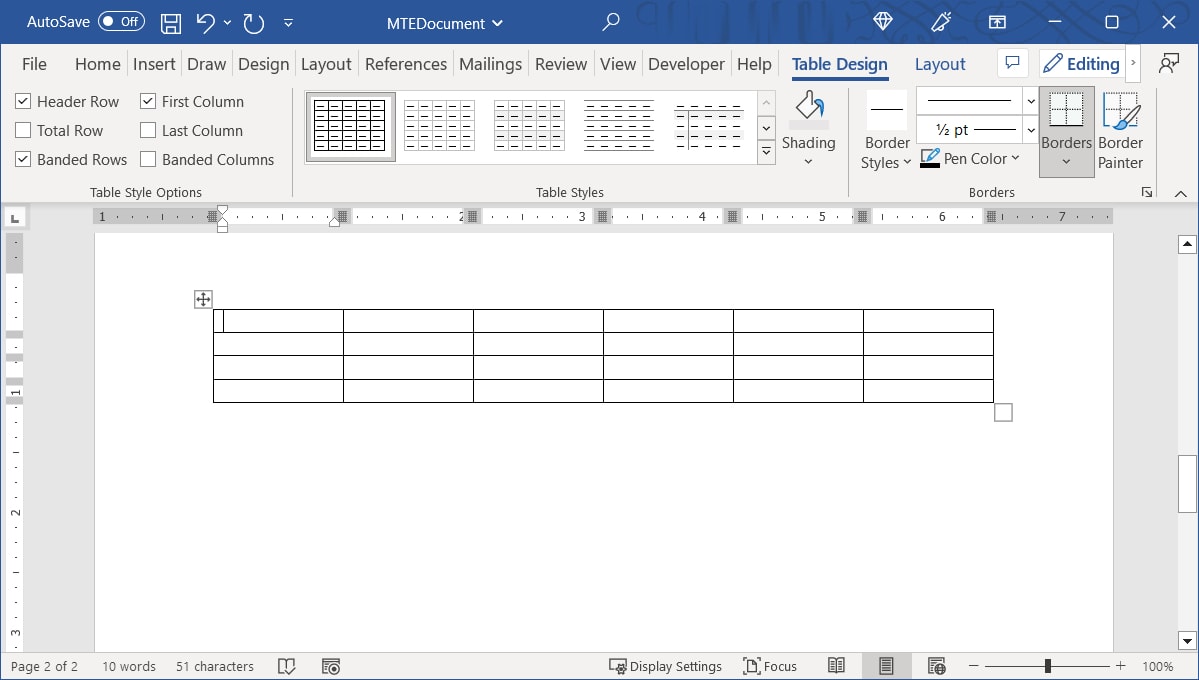
Select the table and go to the “Table Design” tab.
Add a Border
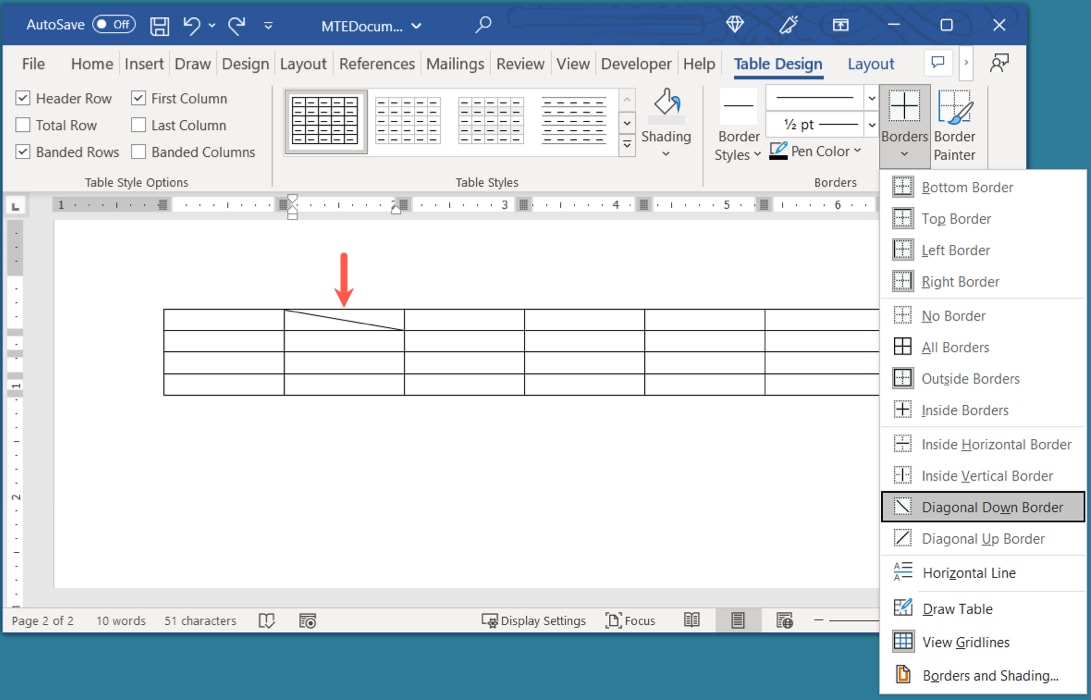
- Use the “Borders” drop-down menu to choose the type of border you want. For example, you can add a border around each cell, on only the outside of the table, or vertically on the inside of the table. As you hover your cursor over the options, you’ll see a preview on the table itself.
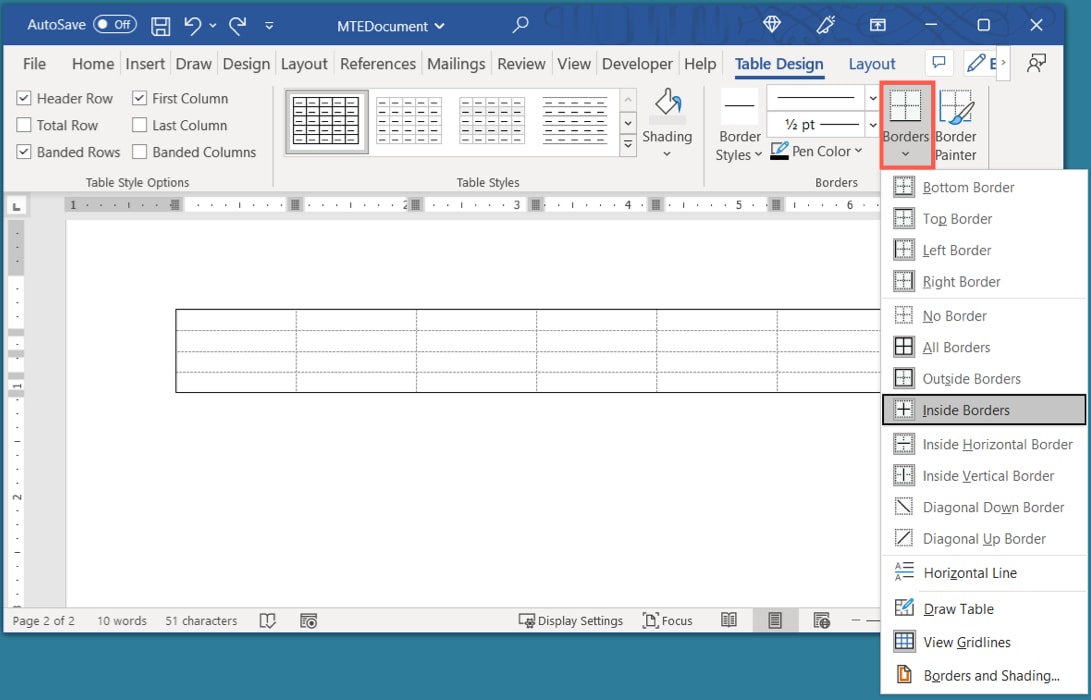
- Click to apply the border you want to use.
- If you prefer to place a border around a specific cell, column, or row, select it first, then open the “Borders” menu and choose a style.
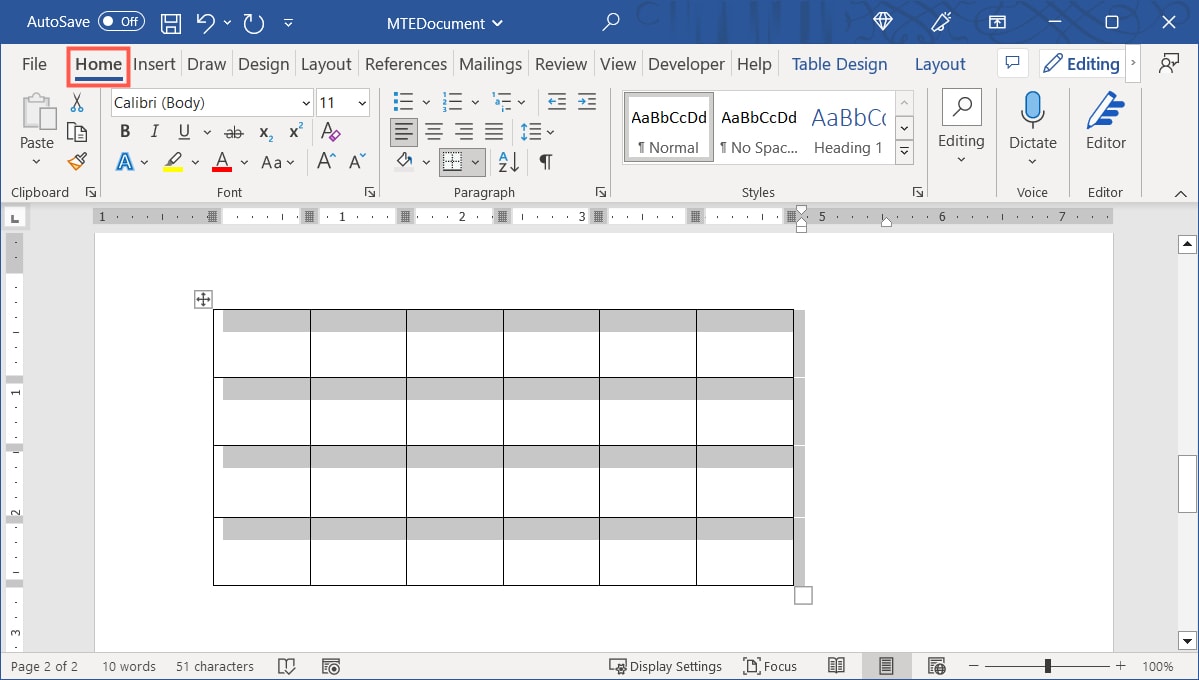
Apply Shading
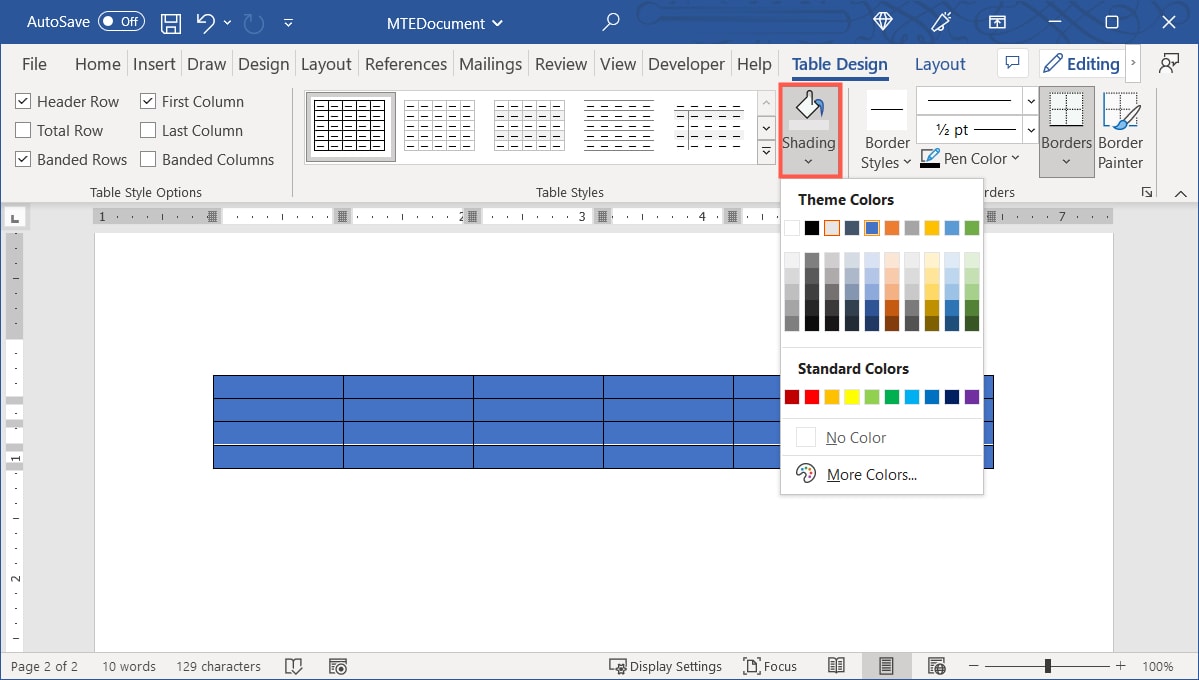
- To shade the cells in your table a particular color, use the “Shading” drop-down menu to choose a color you’d like.
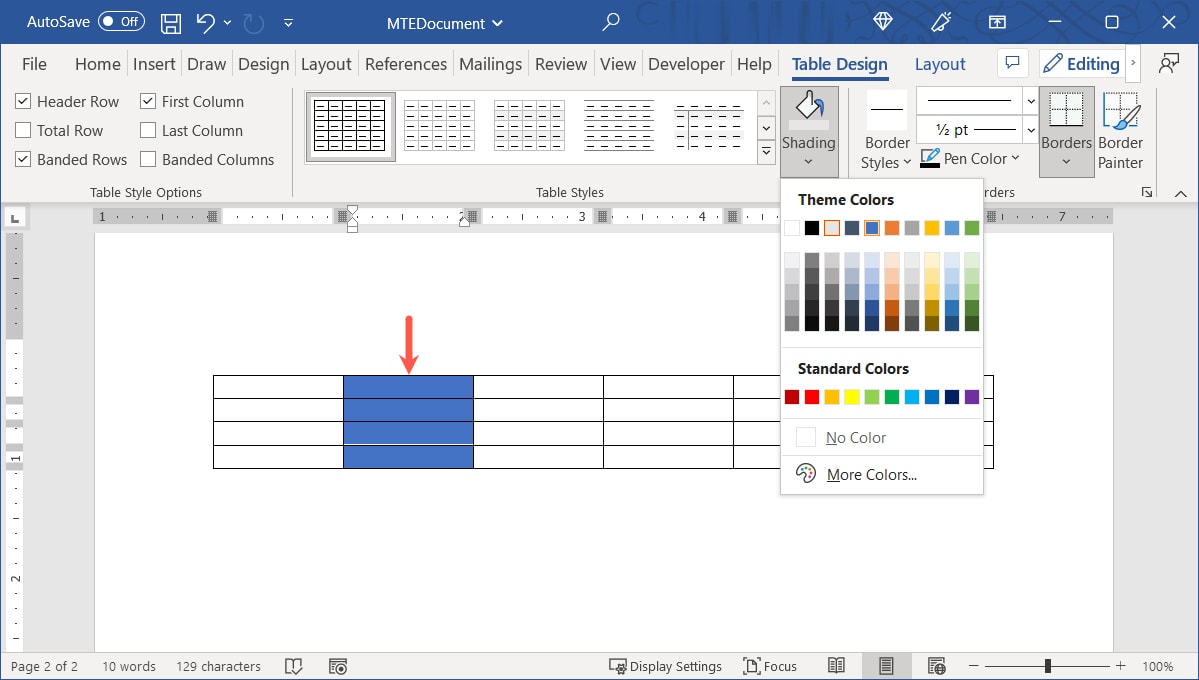
- If you prefer to shade only a cell, column, or row, select it first, then use the “Shading” menu to choose a color.
How to Apply a Style to a Table
As an alternative to borders and shading, choose from one of Word’s premade table styles. These allow you to add accent colors and borders with little effort.
- Select the table and navigate to the “Table Design” tab. Use the up and down arrows in the “Table Styles” box to view the options or the More arrow on the bottom right to see them all.
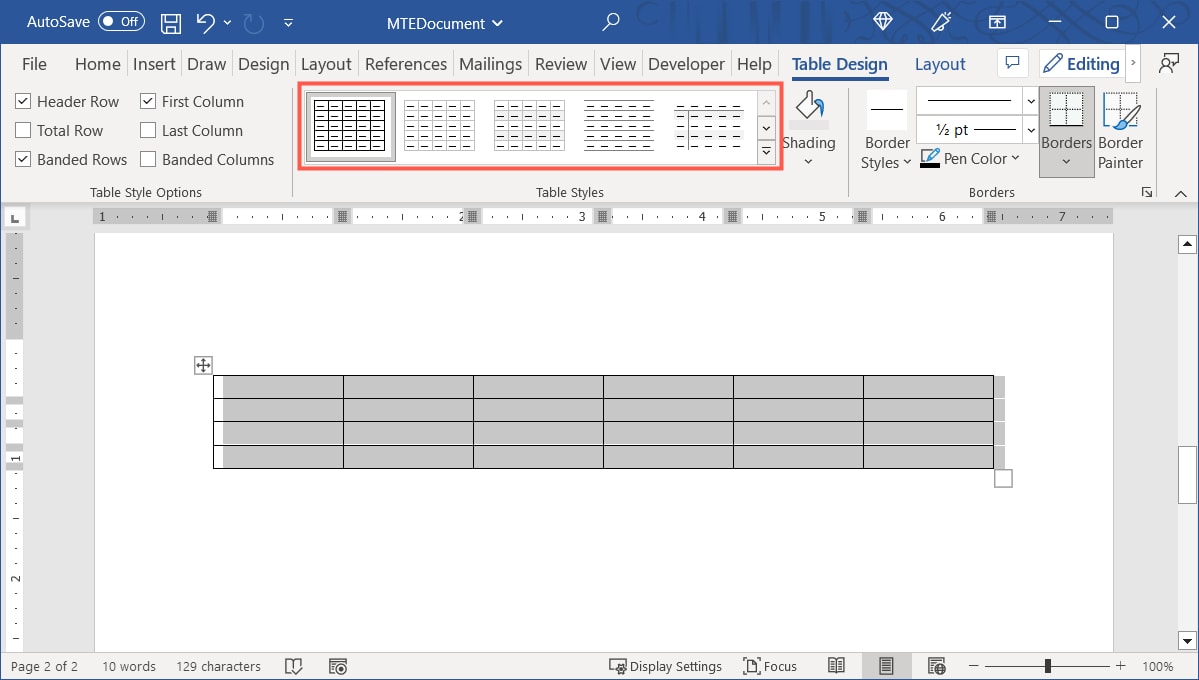
- Hover your cursor over an option to see a preview of it on your table.
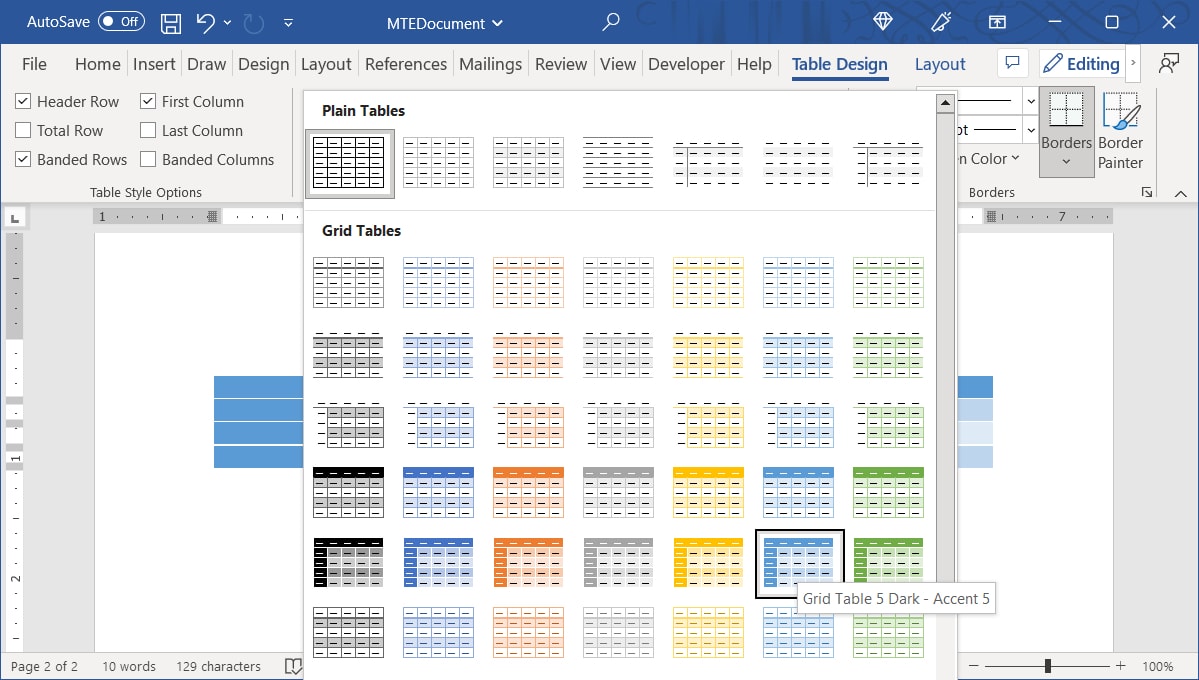
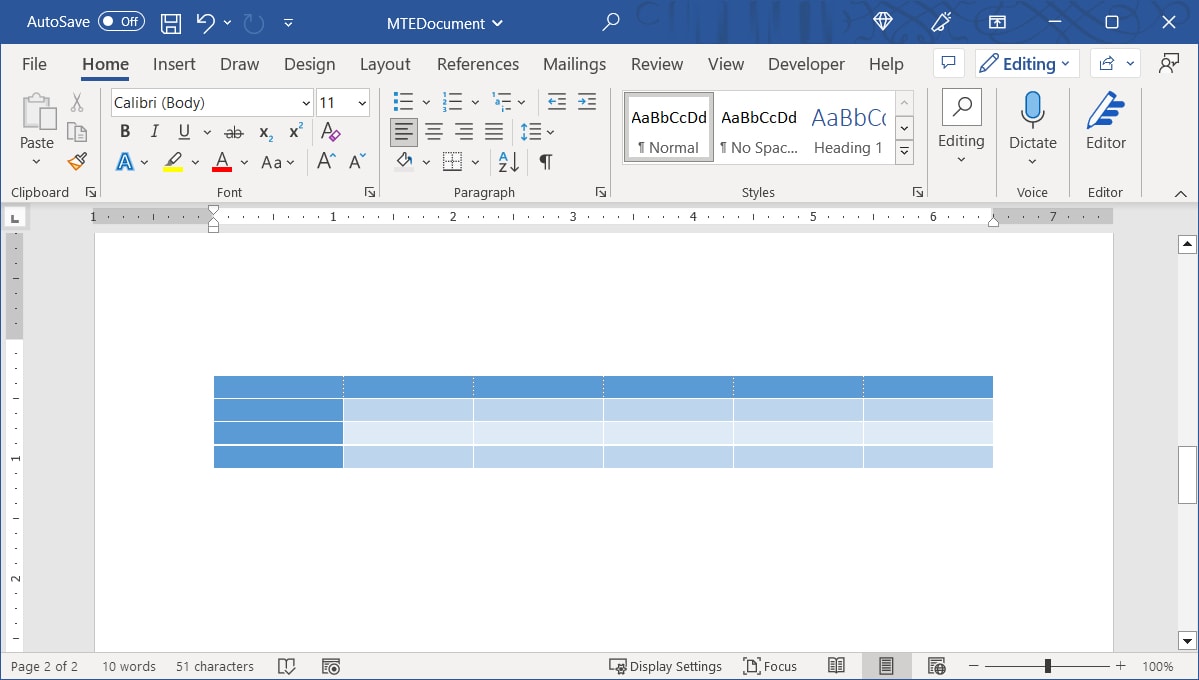
- Click to choose the style you want.
Tip: you can also style text in Microsoft Word.
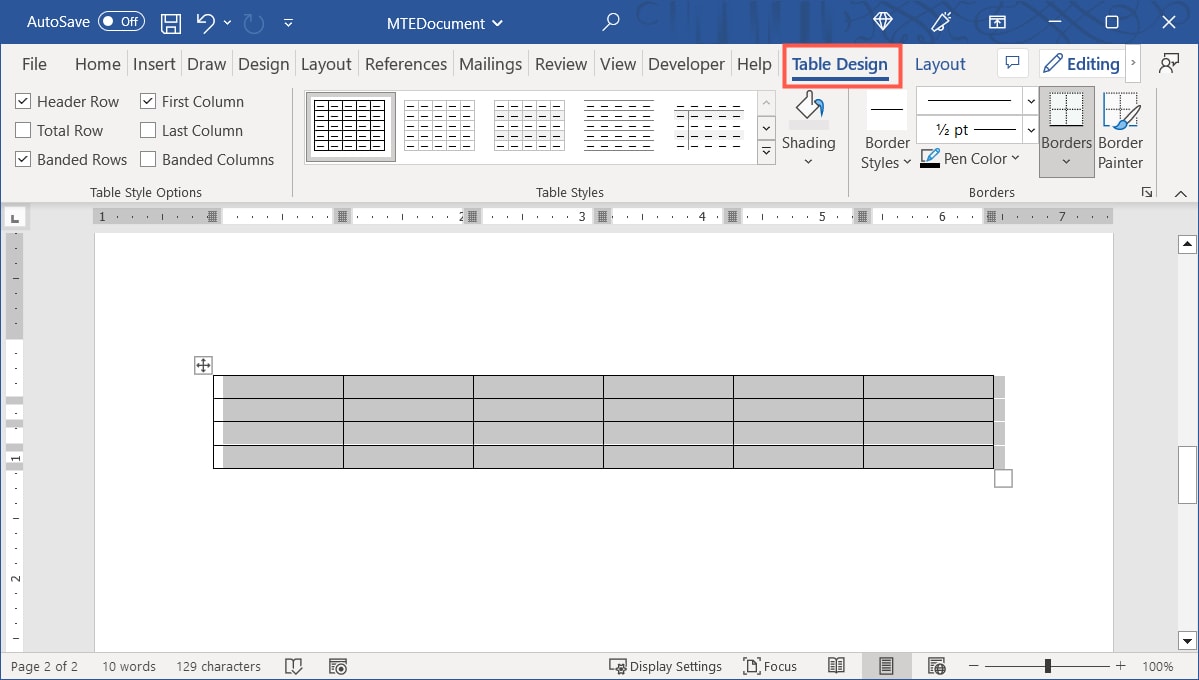
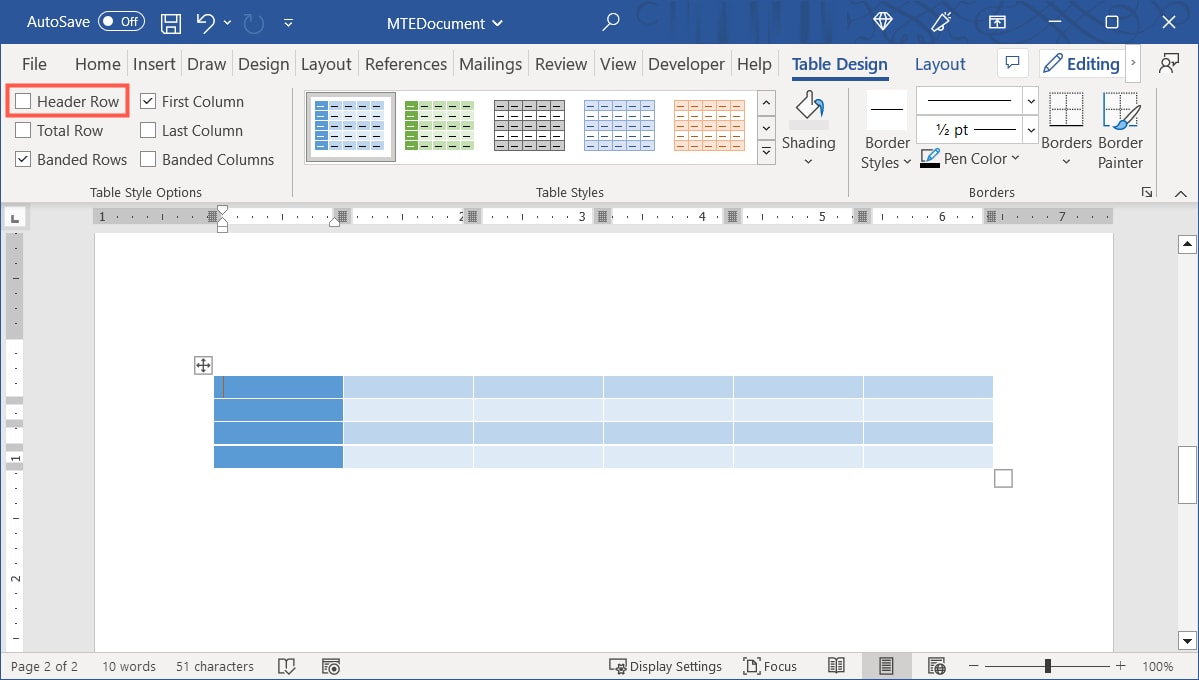
Include or Remove Header, Total, or Banded Rows
If you apply a premade style to your table, you can adjust it per your preferences. You can include or remove the header row, total row, first or last column, or banded rows and columns.
Select your table and return to the “Table Design” tab. Check or uncheck the corresponding box(es) in the “Table Style Options” section of the ribbon.
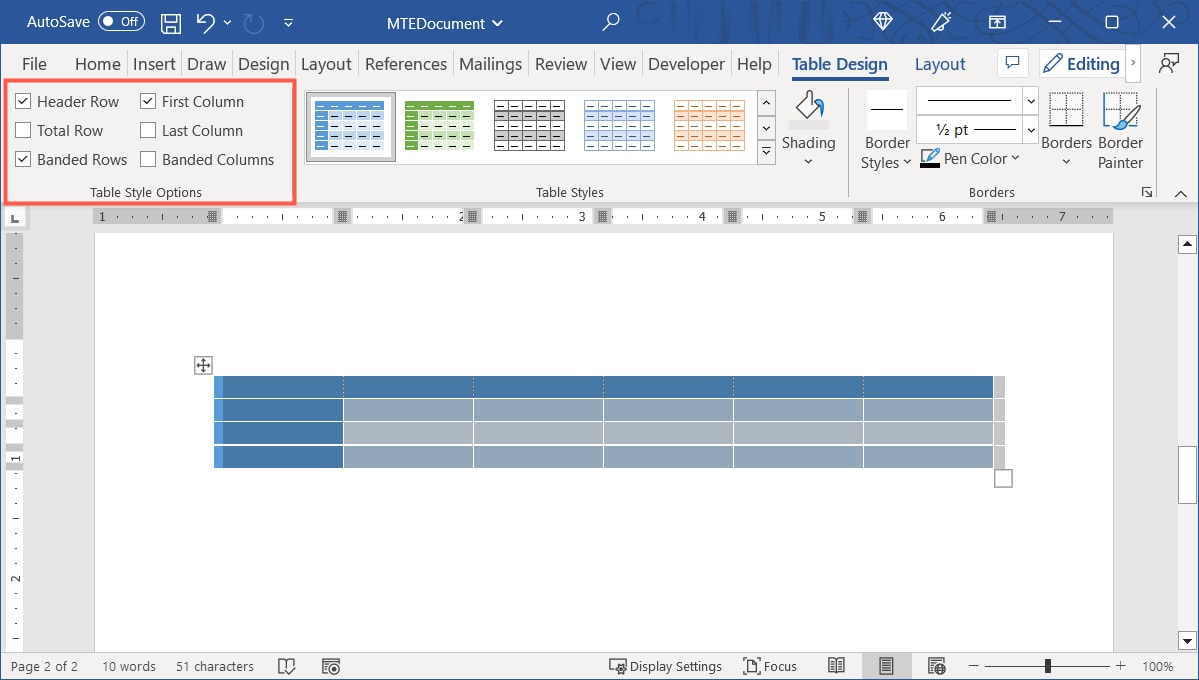
For instance, if you choose a table style that has a dark shaded header row, you can uncheck the “Header Row” box to remove that formatting.
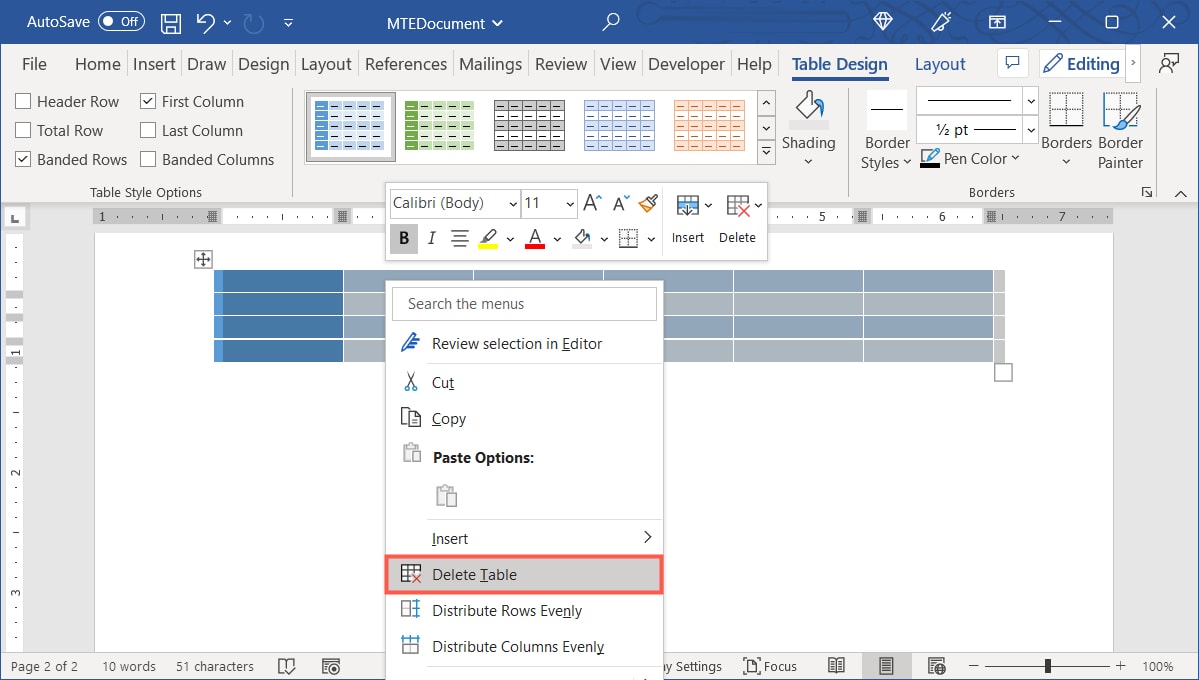
How to Delete a Table in Word
If you insert a table that you no longer need, you can simply remove it from the document. Keep in mind that this removes the table as well as the table’s contents.
Select the table, right-click, and choose “Delete Table.” You will not be asked to confirm this action, so make sure you want to remove the table before proceeding.
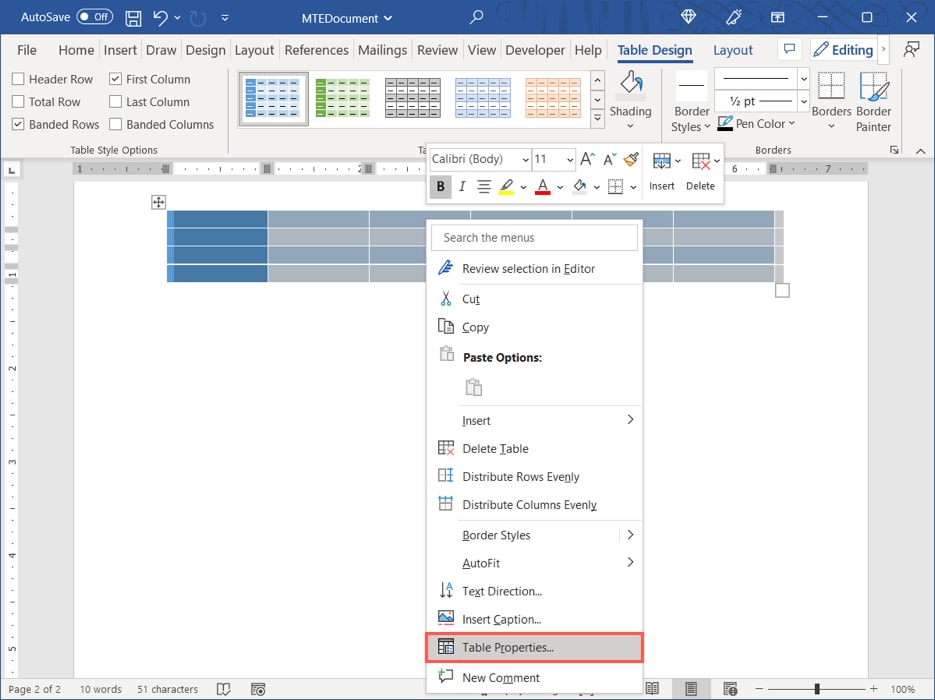
Additional Table Properties
Along with the above customization and formatting table options in Word, you can also set a specific height for your rows or a different alignment for the cell contents.
- Select the table, right-click, and choose “Table Properties” in the menu.
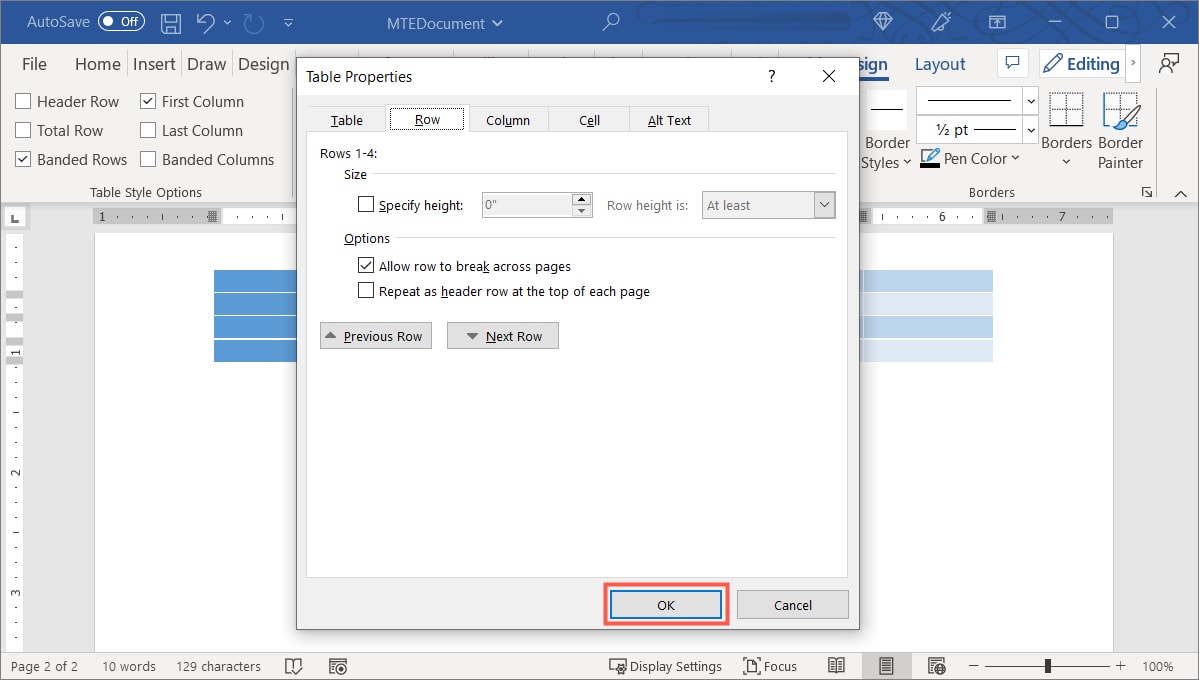
- When the Table Properties box displays, use the tabs to adjust for size, text wrapping, alignment, and alt text.
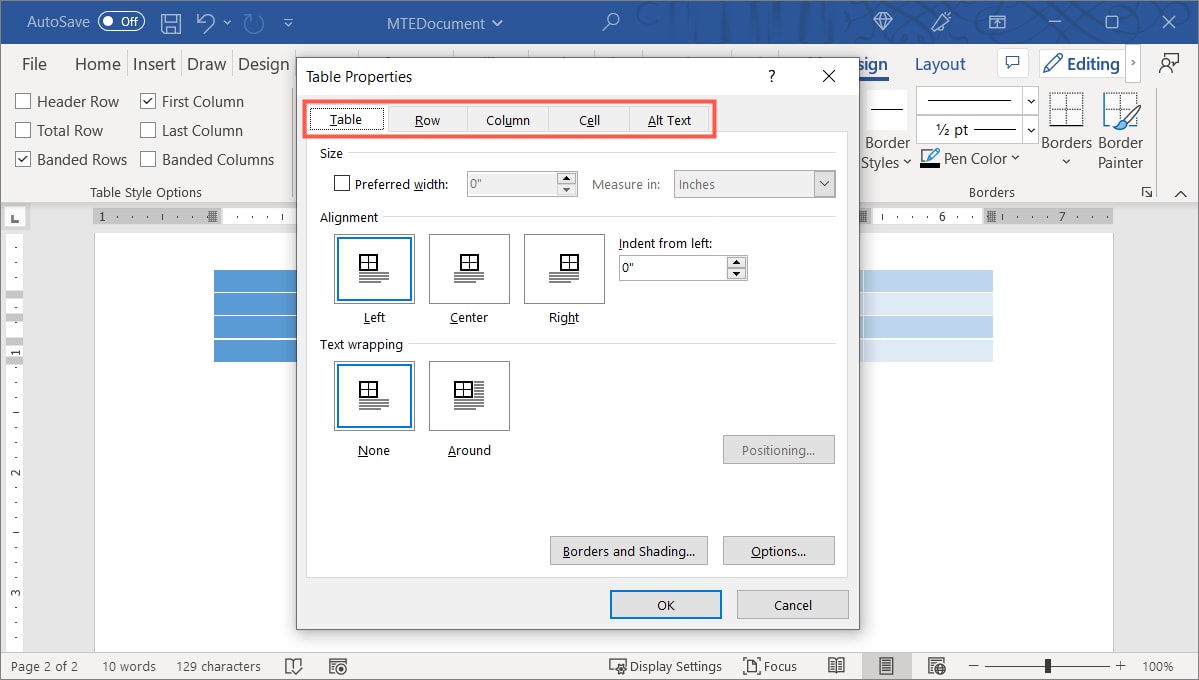
- Click “OK” to apply the settings to your table.
Remember, you can also select the table and review the additional formatting options in the “Table Design” tab.
Tip: you can copy your table from Word to PowerPoint.
Frequently Asked Questions
Can I use existing text to make a table in Word?
Rather than cut or copy and paste text from your document into a new table, you can convert it.
Select the text, go to the “Insert” tab, open the “Table” drop-down menu, then choose “Convert Text to Table.” Choose the number of columns and rows for your table. Note that you may still need to adjust the placement of the contents within the table.
Can I draw my own table in Microsoft Word?
Word gives you a feature to draw your own table from scratch.
Go to the “Insert” tab and select “Draw Table” in the “Table” drop-down menu. Use your cursor, which transforms into a pencil icon, to draw the outside of the table and the columns and rows inside.
How do I create a table of contents in Word?
Format the main sections of your document using the Heading 1 and Heading 2 styles in the “Home” tab. Go to the “References” tab and choose a style in the “Table of Contents” drop-down menu. For complete details on the process, check out our guide on creating a table of contents in Word.
Image credit: Pixabay. All screenshots by Sandy Writtenhouse.