Adobe Photoshop has included automation features for more than a decade. The process is more complicated than if you were using dedicated tools for the job, but that’s because Photoshop also allows you to build complex automation scenarios that can apply a multitude of tweaks and edits to your images.
Here we will show you how to set up automation to batch-process a single task, such as watermarking your images, or in this case resizing images to a target resolution. We will also explain how you can build on that to create more complex scenarios yourself.
Setting Up Automation in Photoshop
To automate things in Photoshop, you must first create one or more actions. After that, you will be able to recall and apply those actions on your files.
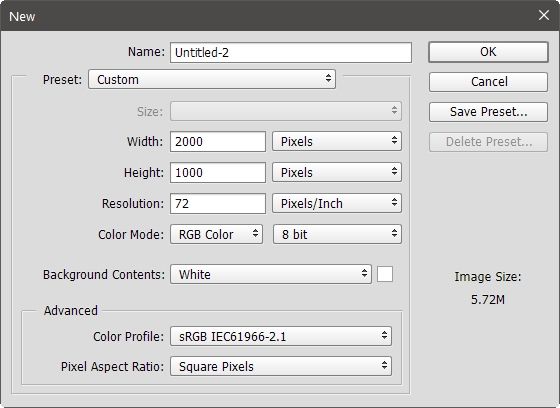
First, select “File -> New” to create a new document.

The settings here don’t matter since the document will act as the base on which we will build the actual actions. Enter whatever width and height values you wish or leave it at the default, then click OK.
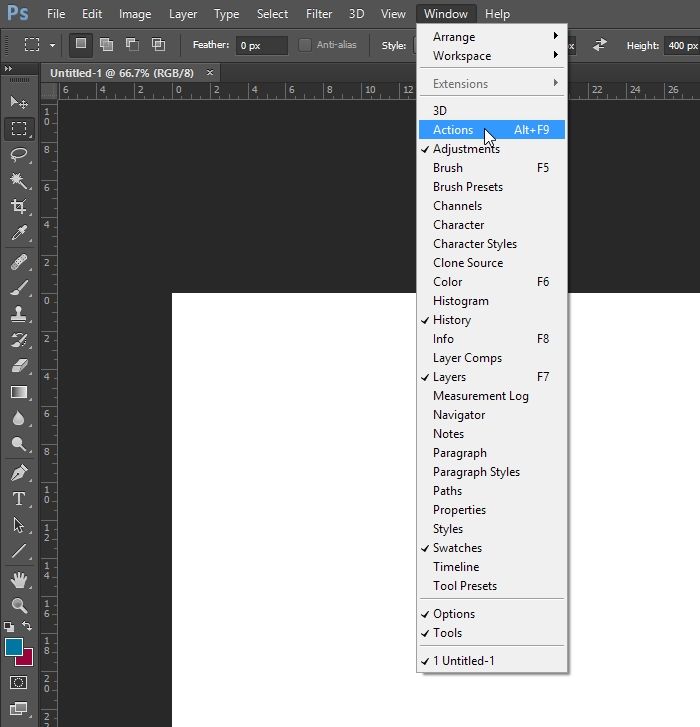
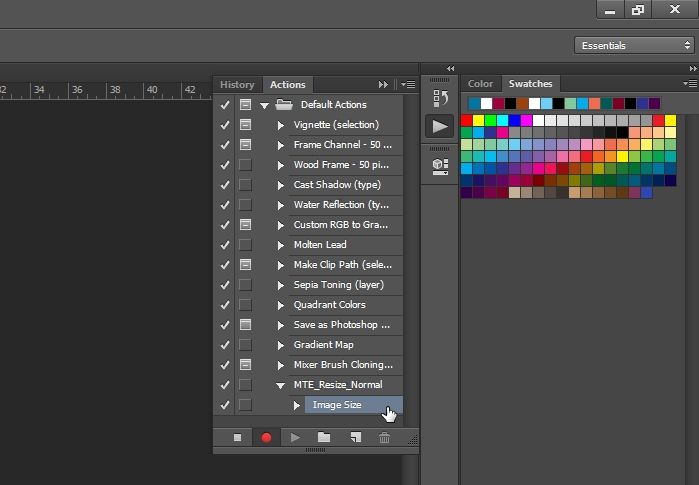
If you can’t find the Actions panel in your workspace, you can display it by either pressing Alt + F9 on your keyboard or selecting “Window -> Actions.”
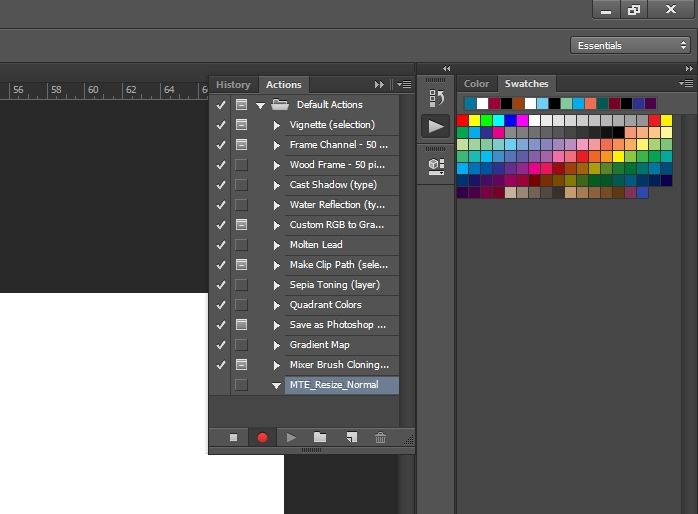
Notice the buttons at the bottom of the Actions panel. Click on the fifth one with the “blank page” icon, “Create new action,” to do precisely that.
Enter a name for your new action in the window that pops up. If you wish, you can bind a Function key to it or assign a color to differentiate it from the other actions. Click on Record.

As you’ll return to Photoshop’s main interface, you might notice that the second button at the bottom of the actions panel, the “record” one with a little circle as an icon, is activated/colored red. Everything you do from now on will be recorded as a new step in the action you just created.
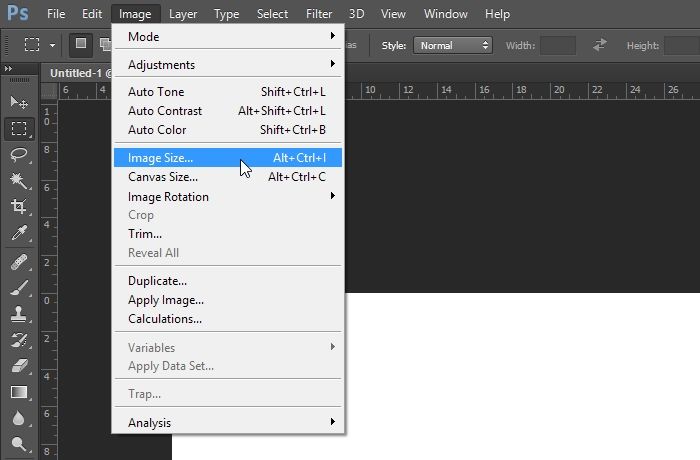
Since what we want for our example action is to resize our images, select “Image -> Image Size.”
We entered “700” as the width, in pixels, since that is the usual size for most images on this site. Feel free to tweak the values and options as you desire, then click OK.
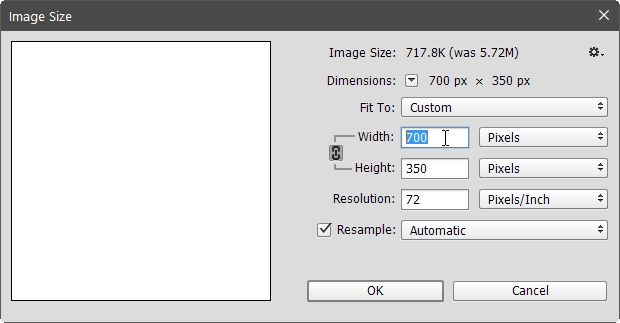
When the window closes, you will note that Photoshop has recorded everything in an “Image Size” step “inside” your Action. Although we will stop here, this is the point where Photoshop allows you to create complex scenarios. You can record other steps that are required to complete your task.
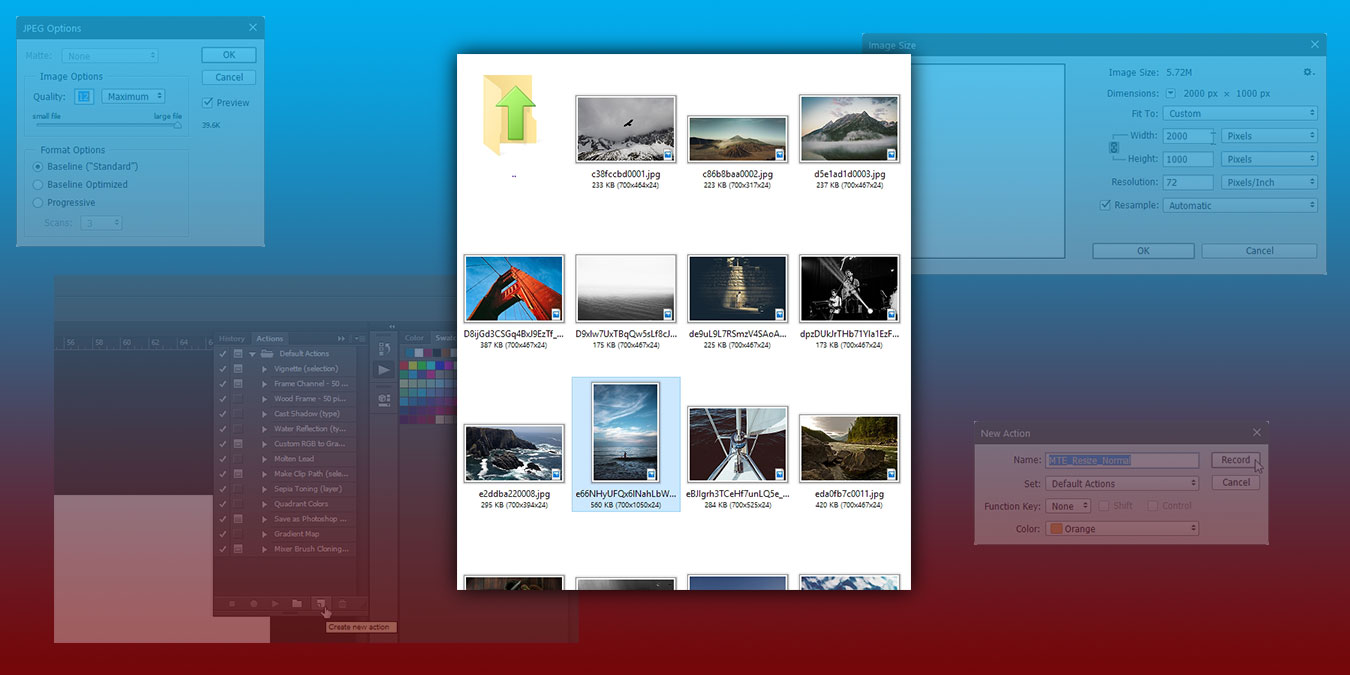
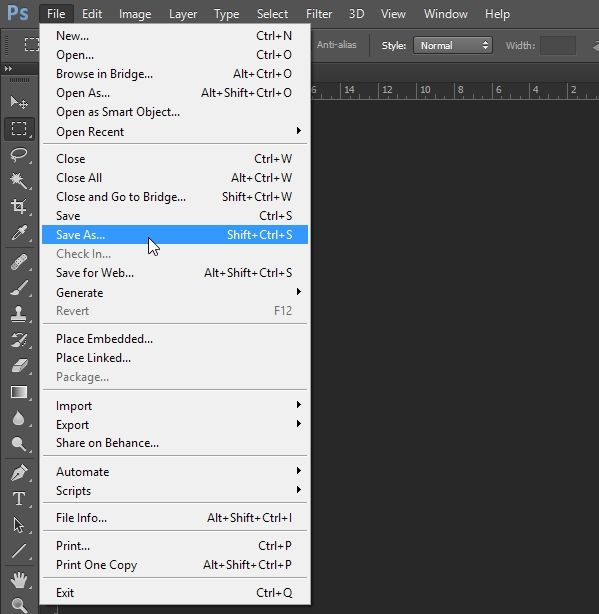
Once you are done with all your steps, save the result by going to “File -> Save As …”
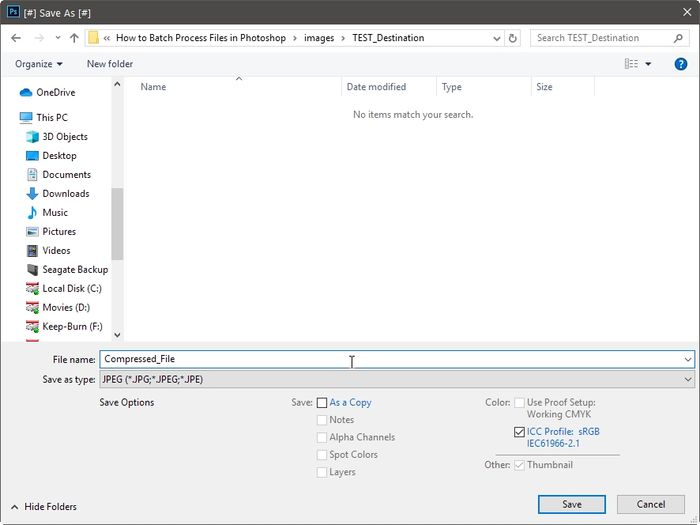
In the window that appears, select the folder where you want the results of your action to be saved, the type/format of the files, as well as a placeholder file name, and then click Save. If needed, also tweak any parameters of your selected output file format.
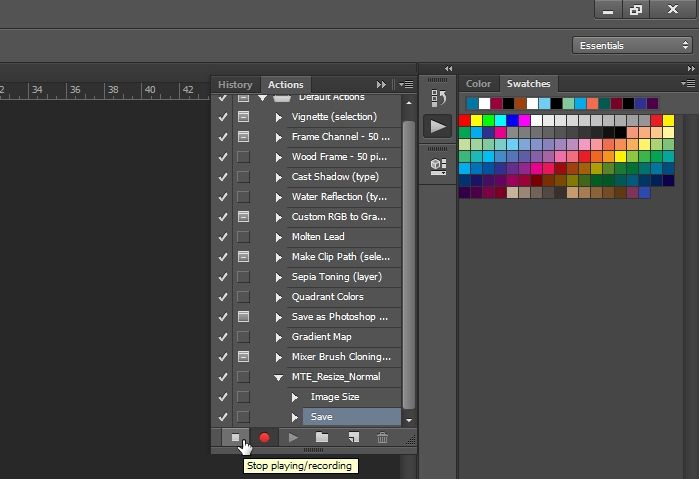
Next, return to the Action panel and click on the first “stop” rectangle icon to stop recording steps.
Also read: The Best Photoshop Alternatives for Mac
Batch-Processing Files in Photoshop
With our action ready, it’s time to see how we can apply it to multiple images at once.
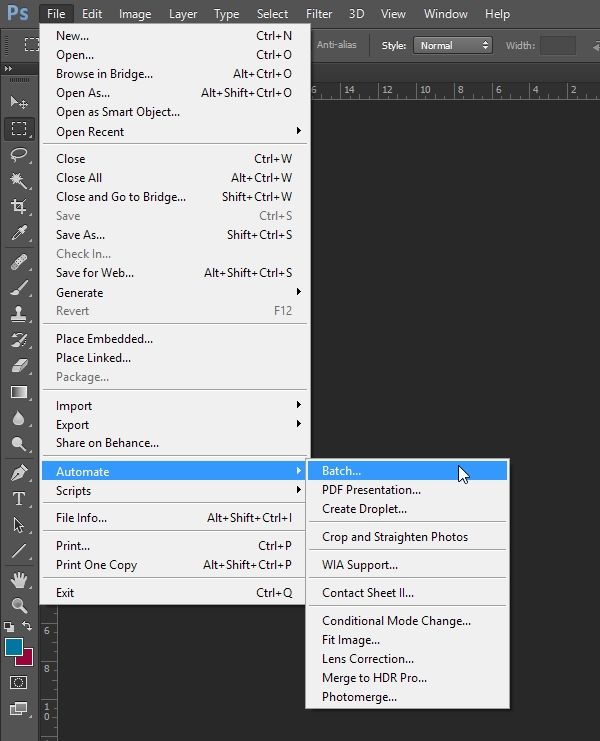
Select “File -> Automate -> Batch …” to display Photoshop’s batch-processing window.
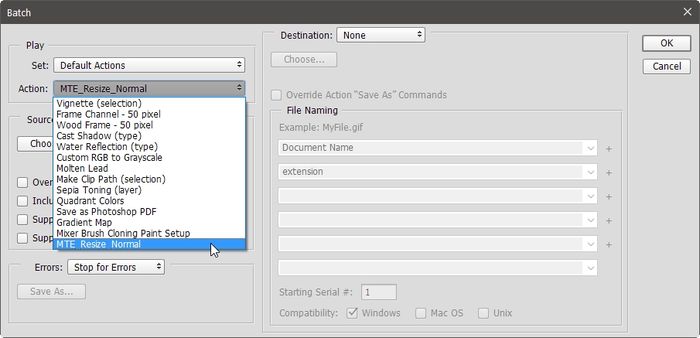
Choose the action you created from the respective pull-down menu.
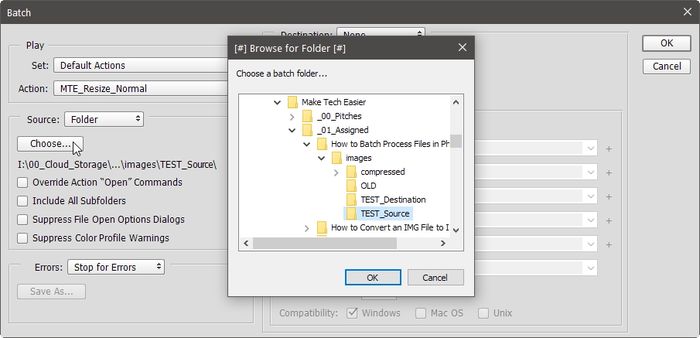
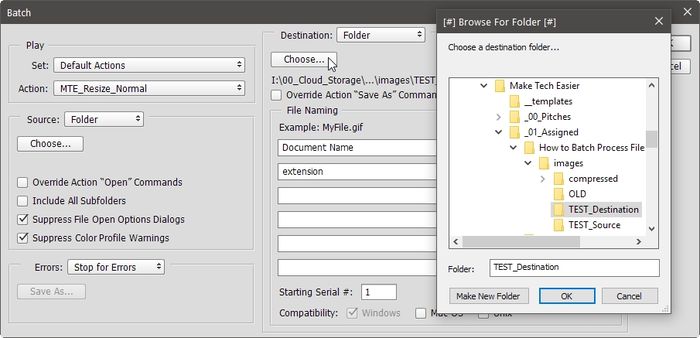
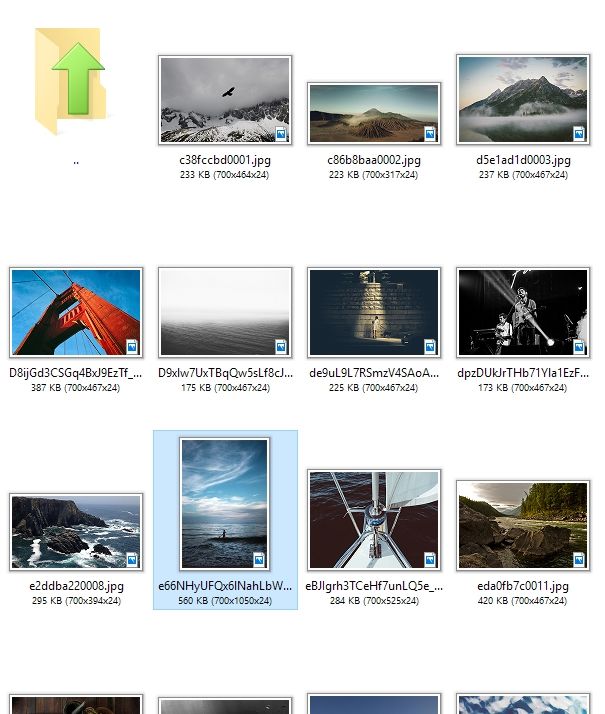
Change your “Source” to a folder, click “Choose …” and select the folder with pictures you’d like to process with your action.
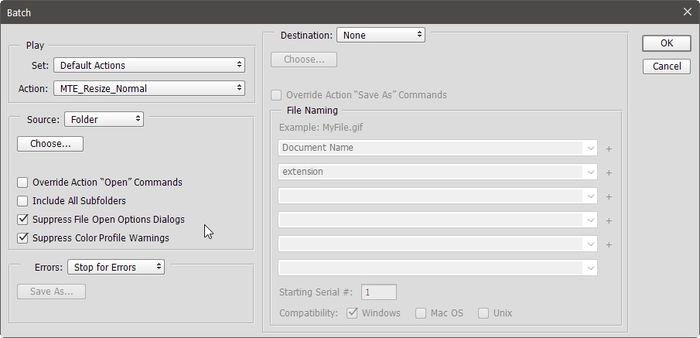
Enable both “Suppress File Open Options Dialogs” and “Suppress Color Profile Warnings” to avoid Photoshop bugging you about some (unimportant for what we are doing) errors.
Change your destination to a folder from the “Destination” pull-down menu.
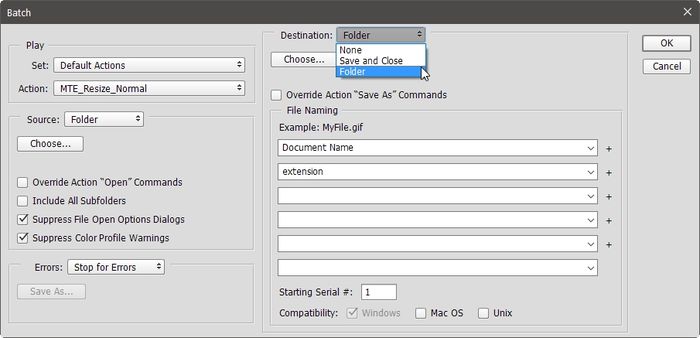
Just like for your source folder, click on the “Choose …” button, accompanying the destination pull-down menu, and select a folder where you want to save the processed files.
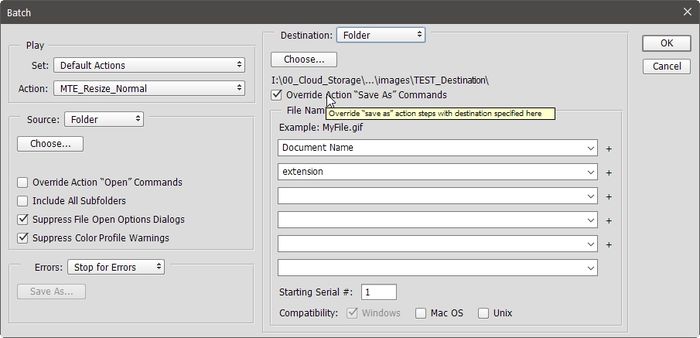
Enable the “Override Action Save as Commands” so that Photoshop also doesn’t bug you about where and how it should save each file.
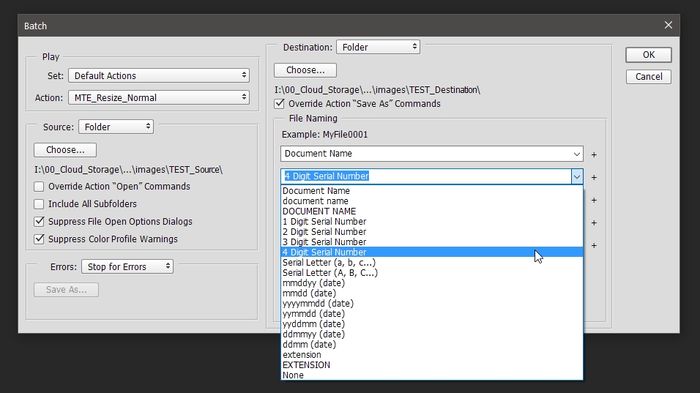
If you want, you can tweak how output files will be named. You can choose and mix different naming schemes in the “File Naming” section. We decided to use the original filename (“Document Name”) plus a four-digit serial number and a file extension.
Click on OK on the top-right of the window, and after a little while you will find your processed files in the output folder you selected.
That’s it. You can now automate and batch process files on your Photoshop. If you are using GIMP, the alternative to Photoshop, you can easily batch-process files on it too.